Friday, February 10, 2012

After Hunting Season Rut????

During a "normal" hunting season, everything seems to revolve around "the rut".  Maryland has a pretty late deer hunting season, with late bow season closing out the season for the last few weeks of January.  Normally rut behavior begins toward the beginning of October and is in full swing, peaks in November, and winds down in the beginning of December.  Although, sometimes there is a "second" or late rut that occurs for a brief time in December.  Maryland's gun season is in full force by then, so often rutting behavior is replaced by survival behavior and, as a result, seldom observed in the field.

By late season, most hunters probably believe that the rut is over, and, up until recently, that included me.  We're used to seeing colder weather and the deer yard up in larger groups.  By the end of January, sometimes we witness deer that pass our stands that, at first glance, seem like big does until it's realized that those big red spots on their brows resulted from their antlers dropping.

Hunters know that sometimes the antlers don't drop for maybe a month past the end of bow season, so we tend to focus our shed hunting activities a few weeks later.  However, my learned notions of deer rutting behavior changed for me a week ago when I witnessed something that may change my hunting tactics and outlook forever.

My work locale is a completely fenced in facility with guarded gates, and has been that way since the years following 9/11.  The environment is much like a college campus with some limited wildlife habitat scattered about, with the entire complex embedded within a suburban setting just fifteen minutes from the Washington, D.C. line.  It's not exactly known as a haven for observing a deer population.  A few years ago, we began seeing a few does that found their way on campus.  I asked a couple campus police how the deer were able to access such a tightly guarded facility.  The response was something like, "They walked through the gates.  What should we do?  Ask for their IDs first?"

A year or two after that, the first bucks started showing up.  Since then, the population grew.  We've had the luxury of observing deer behavior in a closed setting, including rut behavior and breeding.  I pretty much see deer every day right outside my office window or near any field or wooded area on the property.  Sometimes they simply walk around or among the many office buildings.  As a hunter, I can't hunt these particular deer simply because it's not legal.  However, the deer behavior that I observe here provides me with valuable clues as to what the deer may be doing on the properties that I hunt, only an hour or so away near my home.  Deer are deer everywhere, right?  Well, this approach seems to work for me. 

But, on February 2nd in Maryland, while on my way into work, after parking my car in the parking garage, I observed something that people only see once in a while in the wild, but even more strange, something that never happens this late in winter...in February (for crying out loud)...and if it does, it has to be a pretty rare occurrance.  Or, is it?

So, what happened?  I looked out of the back of the garage that caused my jaw to drop.  I nearly scraped my chin on the floor as a result!  I witnessed three bucks and a doe.  Two of the bucks, a large racked eight point and a smaller six point, were locking antlers in a shoving match.  And it wasn't just sparring, they were going at it.  On top of that, a medium sized eight point strutted over to join the fun!  The sounds of antlers cracked, leaves were rustling, branches were thrashed as the bucks wrestled for position to gain an advantage over each other.   Did I mention that this was February?
This was the bigger of the three bucks, from a picture taken a several months ago behind the garage.
As this happened, I'm scrambed for my cell phone to catch this action on film.  By the time that I had the movie feature ready, they were done.  Or, were they?

The smaller buck held it's own but was eventually chased off by the bigger buck.  The two eight points locked up and attacked each other soon after, but I missed that action too.  The good news was that the little buck worked his way back for more.  I only had about fifteen more minutes to watch this spectacle because I was due in the office soon, so if I was going to capture some sort of proof on film, it had to happen fast.  I figured that nobody would believe me.  I needed proof.  Meanwhile, the doe was standing there observing the whole thing, almost amused that she was the center of all of this activity.

After a few minutes, while the bigger buck worked his rack over a sapling, mangling it, the smaller buck snuck back toward the bigger buck.  The bigger buck turned, and the smaller buck approached, and they locked up again.  They fought for a good ten minutes before I had to leave.  I'm sure that they went at it for a short time after I left.

The good news is that I captured some of the event on film!

Once in the office, every now and then I'll get up to stretch my legs, to get the blood flowing after a few hours of performing my sedentary duties.  Of course, I have to glance out the window to observe any other deer behavior.  Upon doing that, I observed that the bucks were all bedded down together near that one doe.  By the way, there were four other does in the field directly behind my office, but the bucks had no interest in them.

After my tour of duty ended, I returned to the gargage to access my car and head home.  But, of course, I had to check behind the gargage and see if anything else was going on.  And, there sure was.  The bucks kept following that doe, nudging her behind with their noses and racks, and in some sort of pecking order (but not quite fighting), tried to assert each others dominance over each other.  They were actually in a late rut!  I couldn't believe my eyes!

Prior to observing this, I thought for sure the antlers would be dropping soon.   When the bucks made contact, and especially in the form of battle, I was sure an antler would drop off.  In fact, I was hoping that one would so I could run back there and nab it!!!!!!  But, they held strong.  No shed antlers for Fat Boy on that day.

So, was it the weather causing this?  In a large doe population, I can understand why the rut could extend until all does have been courted, which could take a while, but this deer population is rather small, about twenty to thirty deer at most.  Plus, five of those deer were bucks.  I thought this was such a weird event that I had to share it here and on some of the forums that I frequent.

What does this mean for my future hunting plans?  I can tell you that, during late bow season, I won't leave my rattling antlers, grunt call, or scents at home.  I'll be using them!

For your enjoyment, I've embedded the videos below.  I apologize for the lack of quality, but all I had was my cell phone.  The first video shows a few minutes of the larger and smaller buck locking antlers and fighting.  It's hard to see at first, but about half way through the video you can see them quite easily.

This last video shows the bucks following and nudging the doe.  Looks like rutting behavior to me!  There was a full moon last week.

I hope you enjoyed this as much as I did.  Just when I think that I understand Odocoileus virginianus, they throw me for a loop with something like this.

Sunday, February 5, 2012

On the Hardwater - Jigging Spoons and Blade Baits

A basic staple of cold water fishing is to toss chunks of metal into deep water where flash, vibration and flutter draw a reaction strike from some sort of predatory fish.  Many years ago, a resourceful angler, Julio T. Buel invented a fishing lure called a spoon, somewhere around 1821 and finally became the first to commercially manufacture them in 1848 (see footnote 1).  It's believed that he fashioned his first spoon lure from an ordinary tea spoon, possibly by severing the handle and attached a hook to it.  Spoons have been catching predatory fish even since, especially through the ice.  For the most part in ice fishing, we use two types of spoons, slab style spoons that wobble and flutter, or blade baits that vibrate in a similar manner to a lipless crankbait.  Both are affective through the ice.

Of course, spoons come in a wide variety of shapes, sizes, colors and styles.  I'm going to touch on some of my favorites simply because I can show you physical examples of them.  By all means, there are many brands out there that are equally effective.  Of course, the spoons that will work for you depend on the species that you target.  In this post, I'm going to cover spoons that work on lunker panfish as well as larger predatory species like bass, walleye, pickerel and pike.  I'll also cover some tactics and tips that work with these lures.

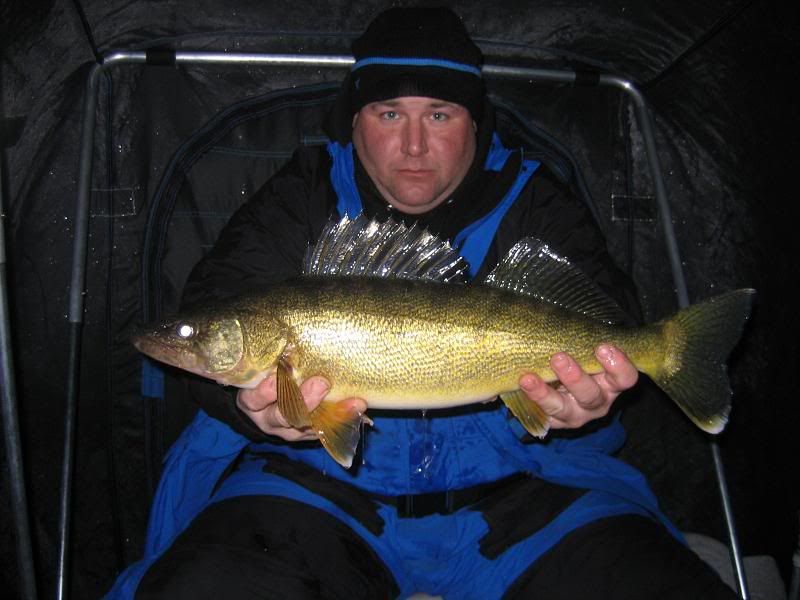
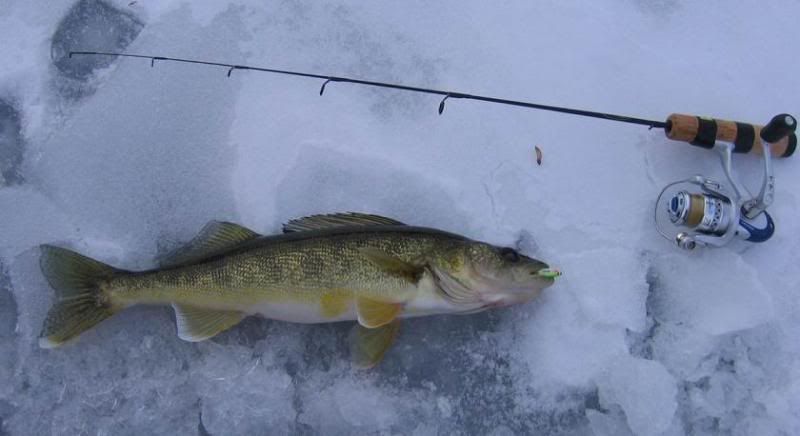
Ken Askins, a.k.a Bean on  Iceshanty , sports a nice walleye that was fooled on a Northland Buck-shot Rattle Spoon.  Photo courtesy of Ken Askins.
Jigging Spoons
The most popular spoons used through the ice are collectively known as jigging spoons, and as the name suggests, are designed for vertical jigging.  Jigging spoons are equally effective  when fished in open water by fishing vertically or cast and jigged on the retrieve.  In this post, the focus will be on techniques used with these lures that are effective though the ice.

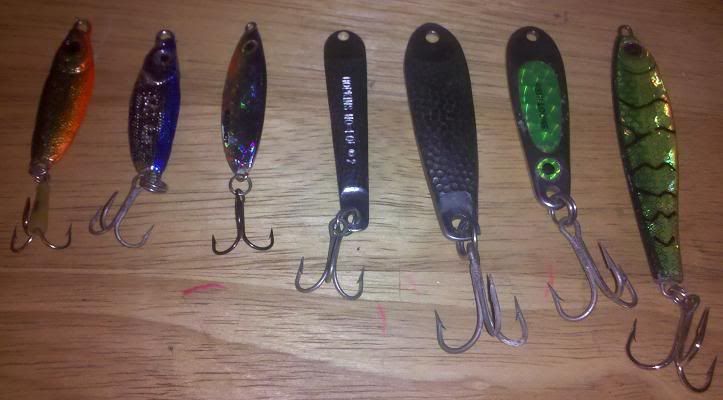
Larger spoons like these will take big fish through the ice.  From left, two Luhr Jensen Crippled Herring, Northland Buck-Shot Rattle Spoon, Hopkins Spoon, Hopkins Shorty, Hopkins Smoothie, and a Bass Pro Shops XPS jigging spoon.  Use these to bounce from hole to hole and cover water.  Big spoons catch big fish.

The results speak for themselves, just look at this fat walleye caught by my good friend Mark Sirko of Pennsylvania that fell for a large jigging spoon.  Photo courtesy of Ken Askins.

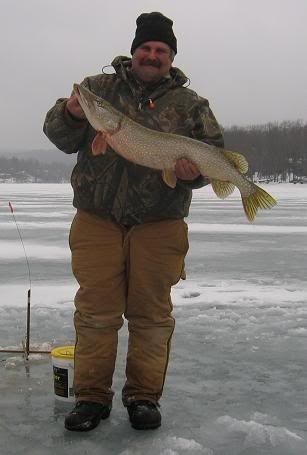
Mark displays a pike that fell for a large jigging spoon.  Catching pike while jigging spoons through the ice is a real thrill.  Nice fish Mark!  Photo courtesy of Ken Askins.
The spoons pictured above are similar in design to the original one invented by Mr. Buel in 1848.  They are, in simplest design, a slab of metal with a treble hook on one end, and a line tie on the other, then painted or finished in such a way as to attract strikes when jigged.  Some are concave, others are thin, others thick, and each type will have a different action.  They come in many shapes that also affect the action.  It's up to you to determine which shape or style will work for you.

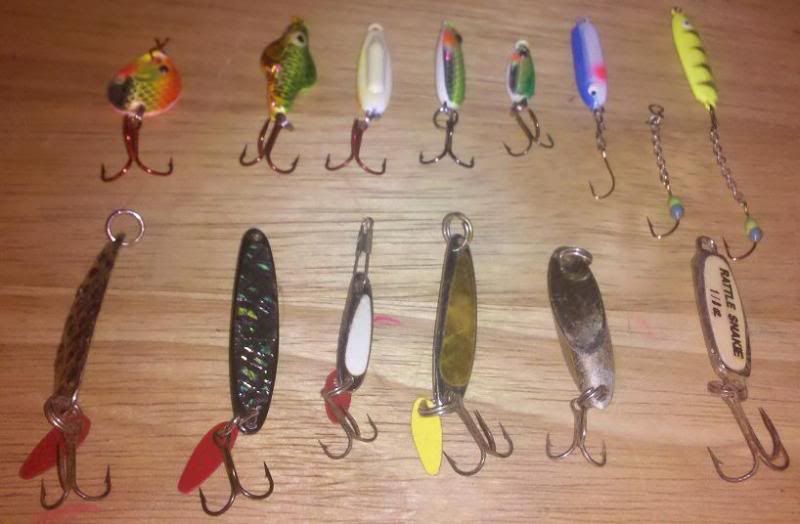
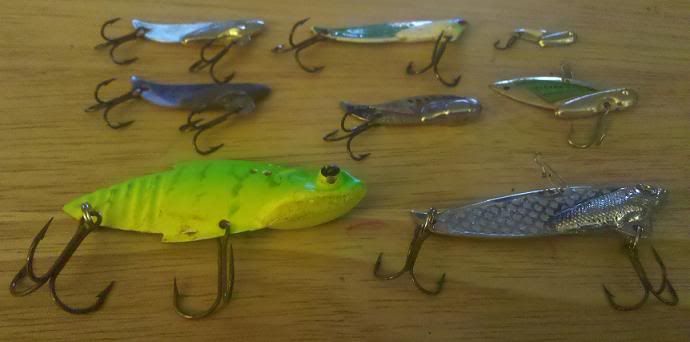
These smaller jigging spoons are popular with ice anglers as they catch both panfish and predators.  When searching for big crappie, jumbo yellow perch, and plate sized bluegills, try one of these.  Top row from left, Northland Eye-Dropper Spoon, Lindy Techni-Glo Rattl'n Flyer, two Northland Buck-Shot Rattle Spoons (showing rattling chamber), Northland Forage Minnow, Hali Sukkula Jigs (showing different chain droppers).  Bottom row, Bay de Noc Swedish Pimples, Acme Kastmaster, and Bass N Bait Rattle Snakie spoon.

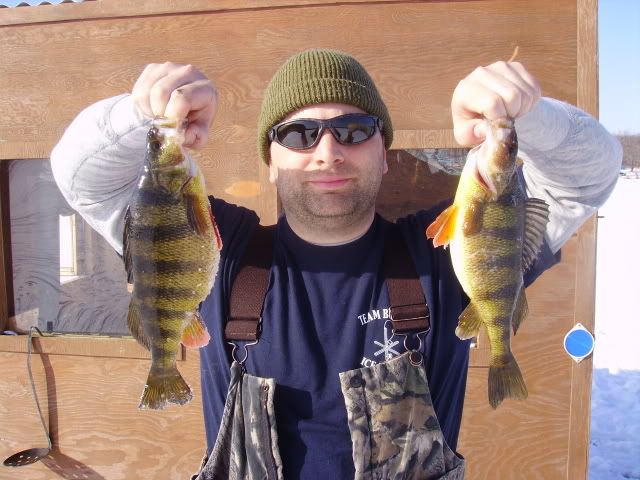
Mike Bushey, a.k.a. adkRoy on Iceshanty from New York poses with some fat jumbo perch that took a Hali Sukkula Jig.  These jigs are hot for panfish and predators alike.  Photo courtesy of Mike Bushey.
Jigging spoons work well because they give off vibrations, flash, and some sort of fluttering action on the fall, to provoke a reaction strikes from aggressive fish.  However, tipping them with bait will also draw strikes from fish already on the feed.  Some jigging spoons sport internal chambers that contain shot or beads that rattle, adding to the attraction that may provoke strikes.  Others are painted in bright colors or even extremely realistic fish imitating patterns.

My buddy Ken posing with a huge crappie that nailed a Northland Buck-Shot Rattle Spoon.  That is one slab crappie!  Photo courtesy of Ken Askins.
Blade Baits
These spoon type lures are designed for a horizontal presentation fished vertically, with the line tie on one side, and two or more hooks on the other.  Most of the time, the line tie is merely a snap inserted through a hole in the blade (spoon).  Some models have multiple holes that provide different action on the lure depending on which one you choose to use.

When you jig these lures up off the bottom, you'll feel the lure vibrate rapidly on the pull.  On the drop, these lures flutter or spiral down.  When sitting motionless, they resemble a fish or a minnow.
Blade baits are great for targeting big predatory fish through the ice, but also work well on jumbo panfish.  From top to bottom, left column, Silver Buddy, Luhr Jensen Rattlin' Ripple Tail; middle column, Heddon Sonars; right column, Reef Runner Cicadas, Bass Pro Shops XPS Lazer Eye.
Fishing Spoons and Blades
When on the ice, I carry a couple rods that are slightly beefier than my panfish rods to jig small spoons and blade baits.  I use four to six pound fluorocarbon line with a small snap tied to the end, or a No-knot Fast Snap, so that I can change spoons easily until I find one that the fish will hit when targeting panfish.  For bigger spoons, my set ups are on eight to twelve pound line depending on the lake, species that I'm targeting, and the weight of the spoon.  Typically, I'll have one that has a rattle rigged on one rod, and a totally different style rigged on the other rod, like a blade bait.  This way I can try different presentations until I can get some sort of response from fish, perhaps bites or reactions that I can see on my camera or sonar.

When fishing jigging spoons or blade baits, most anglers prefer graphite rods with some backbone so that they can easily feel the strikes, and also work these larger lures a good responsive action.  If the rod is too "whippy", the lure action, especially in deeper water, isn't responsive enough.  In other words, your rod tip may be moving and working much harder without the result you're expecting thirty feet under water.  If you want your spoon to travel a foot on your jig, you won't want to have to work your arms and shoulders three feet to get that result.  More importantly, when a fish hits, you want to have a good hook set and a whippy rod won't effectively do that.

Here's a jigging rod set up with a Northland Buck-Shot Rattle Spoon that allowed Ken to ice this fine walleye.  Photo courtesy of Ken Askins.
Another thing that ice anglers do to draw strikes from inactive fish is to tip their lures, or sweeten them, with some sort of bait.  You can use waxworms, spikes (maggots), minnows, and where legal, fish eyes, minnow heads or belly meat.  In addition to tipping them with bait, you can also use Berkley Gulp Minnows or Minnow Heads. 
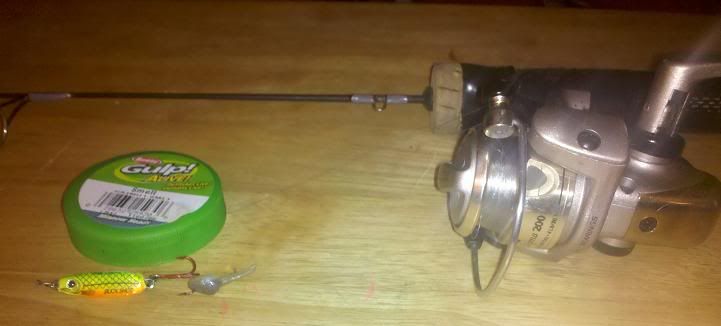
This jigging rod is rigged with a Buck-Shot Rattle Spoon tipped with a Berkley Gulp Minnow Head.
There are a couple ways to work a jigging spoon or a blade bait.  You can fish them aggressively or finesse them.

The Aggressive Presentation:
Drop the spoon until it hits the bottom, then reel up the slack until the line is tight.  Then, raise the rod tip to the eleven o'clock position quickly to draw the spoon off the bottom, then lower the rod tip slowly and let the spoon fall.  It's important to drop your rod tip at the same rate that your spoon falls to keep the line tight.  Watch the line closely because if it goes slack or twitches, set the hook.  Fish often hit these lures on the fall.  Sometimes, if fish are on the bottom, they'll hit as your lure reaches the bottom.  You may not see these hits, but you'll have a fish on when you raise your rod for the next jig.  By raising the rod, sometimes you actually set the hook on a biting fish. 

When you find the school and the fish are aggressive, spoons are good choices because, after catching a fish, you can get them back down quickly to target your next one.  When the schools move often, it's important to get that lure back down there before the school moves off.

Try first without tipping the lure with bait.  This gives the spoon it's best action which will draw reaction strikes from big panfish and predators alike.  Sometimes the strikes are quite violent!  When doing this, you can hit a bunch of holes and not really need your sonar or camera, assuming that you know the depth that the fish are holding.

If the fish aren't hitting the technique above, after a few jigging patterns, let the jig sit on the bottom of your jig for a second, maybe shake it a little bit.  Try different things until they strike.

When the fish are agressive, they'll hit a jigging spoon without bait.  Presumably, when finding your ice fishing spot, you've cut some holes and checked them with your sonar until you've located fish.  Then, you've opened up the area by cutting a series of holes, not just one.  Bouncing from hole to hole with a jigging spoon is a good way to get some quick bites on big fish and pick off the more active predators.  I've caught some of my biggest slab crappie this way along with walleyes, bass, chain pickerel and every now and then a pike.

I spend a lot of time jigging smaller baits and plastics for panfish, and sitting at one hole for any length of time tires out the old caboose and causes my feet to fall asleep.  So, every now and then I'll get up to stretch my legs and walk around.  You can either do this and not fish by visiting your fishing buddies on the ice to see how they're doing, or you can carry a jigging spoon rod with you on the way and hit a few holes.  You have to keep your lure in the water to catch fish.  So that's what I like to do when I need that type of break, to bounce around and hit some holes with my jigging rod, maybe catch a couple fish, and then visit my buds to see how they're doing.

Finesse Spoon Presentations
If your aggressive approach doesn't provoke strikes but you know that the fish are there, then it's time to try a more finesse spooning approach.  First, try adding a bunch of spikes or a minnow head to a treble hook and slow down your jigging.  Try shorter hops with an occasional larger jigging movement, then let the lure sit, maybe shake it a little.  Try different things to get them to hit.  This is when the camera or sonar comes in handy where you can see how the fish react and then adjust.
Mike teased his favorite fish, the rock bass, into hitting his Swedish Pimple.  Jigging spoons catch just about any willing fish through the ice.  Photo courtesy of Mike Bushey.
Even smelt will hammer jigging spoons!  Photo courtesy of Mike Bushey.
If you notice that fish are attracted to all of the jigging commotion but just won't bite, try changing the type of spoon, or color, or size, to see if that might draw a strike.

Sometimes aggressive jigging actually scares fish away.  You can see that on your camera or sonar.  When that happens, try a much more subtle jigging action.  If you've tipped your lure with bait, try jigging them as you would an ice jig with maggots.  On lakes that have larger panfish, jigging spoons worked this way might be worth starting out with, especially with perch and crappie when they're schooled up and moving around.  Often these larger baits will ice the biggest panfish in the school first, or at least the most aggressive ones.
Mike shows off a perch that he nailed on a Hali Sukkula Jig tipped with bait.  Perch just love these things and you can jig them aggressively or fish them like you would smaller ice jigs for finicky biters.  Photo courtesy of Mike Bushey.
Also, spoons are great for drawing the school in because of their visibility.  If the school moves off, jig your spoon aggressively to draw them back.  The flash, vibration and action in clear water under the ice often will attract schools of fish that are aggressively feeding.  If you don't attract the school in a reasonable amount of time, then maybe it's time to bounce around from hole to hole until you find them again.  Bring the sonar with you and your jigging spoon rod, check the hole for the school and if it's there, you can get that lure down quickly to hook up.
Mark shows that jigging spoons will catch a wide variety of fish through the ice.  He landed a jumbo yellow perch and a nice hybrid striper using a jigging spoon.  Photo courtesy of Ken Askins.
I can't tell you how important sonar is in this type of fishing too.  They aren't called "fish finders" for nothing, they will locate the schools for you.  Not only will they locate what hole to fish, but also they tell you the depth to lower your spoon to especially if the fish are suspended.

Mark shows that using jigging spoons will ice big fish like this fat walleye.  If you currently don't include jigging spoons in your ice fishing strategy, you may be missing out on your chance to ice some of the biggest fish in your lake.  Photo courtesy of Ken Askins.
If you don't have jigging spoons in your ice fishing arsenal, then you may be missing out on some terrific ice fishing action.  These lures can ice fish quickly when the fish are aggressive, even fish that seem finicky when fishing smaller jigging presentations.  In other words, sometimes bigger is better.  Try them!

I'd like to extend a special thanks to Ken Askins (Bean on http://www.iceshanty.com/) and Mike Bushey (adkRoy on http://www.iceshanty.com/) for their contribution to this blog post.  Both of them have also contributed some great info on Iceshanty, helping to make it the premier ice fishing web forum on the internet.

Footnotes
1.  Old Fishing Lures and Tackle:  Identification and Value Guide by Carl F. Luckey and Russell E. Lewis

Friday, January 27, 2012

On the Hardwater - Jigging Soft Plastics for Panfish

I started out typing up the second post in this series with the intention creating a follow up to the last one, "On the Hardwater - Ice Fishing Basics I".  It's currently a work in progress and I'll post it in a few days, but I decided instead to post something more detailed, a subject that is truly my passion when fishing for panfish, and that is fishing with artificials, specifically soft plastics.
This yellow perch fell for a Bass Pro Shops one inch pumpkinseed Squirmin' Grub.  Soft plastics can catch a lot of fish in a hurry, especially in early and late season. 
Years ago, my go to rig included a 1/80 ounce jighead, either chartreuse or orange, rigged with a one inch Bass Pro Shops pumpkinseed Squirmin Grub, fished on four pound monofilament line on an ultralight 24" fiberglass cheap fishing rod.  In fact, my first fish on the ice came on that jig.  I tore them up that day on them, and became hooked on ice fishing at the same time.  Since then, that jig has caught many a crappie, bluegill, yellow perch, trout and bass amongst other species through the ice.  Over the years, my soft plastic arsenal has grown, mostly as a carryover from fishing for panfish during open water season, then taken to the ice.

Why fish soft plastics?  There are times when fish of all species can't stop hitting them.  And, you don't have to worry about changing old bait, or replacing bait stolen by fish, and you can quickly get your lure back down to them.  And, there are even times when they won't hit anything else, for reasons I have yet to understand.  During a hot bite, I can catch an extra fish while my buddy is baiting a hook.

So, what kind of soft plastics work well on panfish?  In general, I think small and light, although there are times when bigger is actually better.  When it comes to color, I mostly use either natural colors when the water is gin clear and there is a lot of light penetration below, or bright or glow colors when it's dark or dingy down there.  But, there are times when they need to see something different, and a glow or bright color may work when the water is clear.  I'm also a fan of red and black, red when the water is clear, black any time but especially in dingy water.  As you might expect, glow colors work great at night.  Basically, try different combinations and let the fish tell you.  One way to do that is to fish two jigs in tandem, with different soft plastics on each one, and let the fish choose.
This rod is rigged with two Ratsos, about nine inches apart.  The color choice here includes glow pink and glow blue, both hot colors for crappie and bluegills on the lakes that I fish.  If they both work, I leave them both on.  If one works better than the other, then I try two of the hot color or try something different altogether.  These Ratso jigheads are glow color too.
One of my favorite rigs has two Custom Jigs and Spins size eight Ratsos rigged about eight to ten inches apart.  Preparing this rig involves a small swivel with a three foot leader.  Using your favorite fishing knot, tie a jig about ten inches from the end of the line, but do not cut the tag end.  Then, at the end of the line, tie on the second jig.  Then, add two different soft plastics and see which ones work the best.  Once you determine that, double up on that color, size, or style because you might hook up two fish at a time!  The swivel prevents line twist.  You can tie this rig without a swivel.  I'll go into the advantages and disadvantages of using a swivel later.
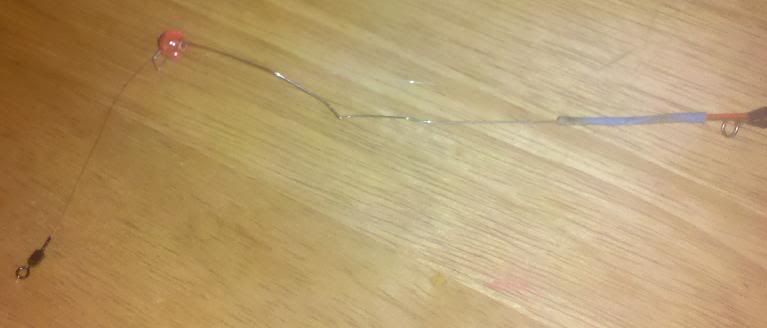
This is the rod tip of my broken South Bend fiberglass cheap jigging rod.  When it broke (slammed in the lid of my box), rather than tossing it in the trash, I made a spring bobber out of light spinner wire and a plastic bead, and used fishing line and shrink wrap to attach it to the end of the rod.  The spring helps me detect the lightest bites.  Notice the swivel that attaches to the leader and main line.
My plastics selection can be divided into two categories, scented and non-scented.  The non-scented plastics are the traditional types that you find that are effective when fishing open water for panfish.  The scented types are soft plastics that are biodegradable or have some sort of scent mixed in with the plastic that have really gained in popularity over the past several years.
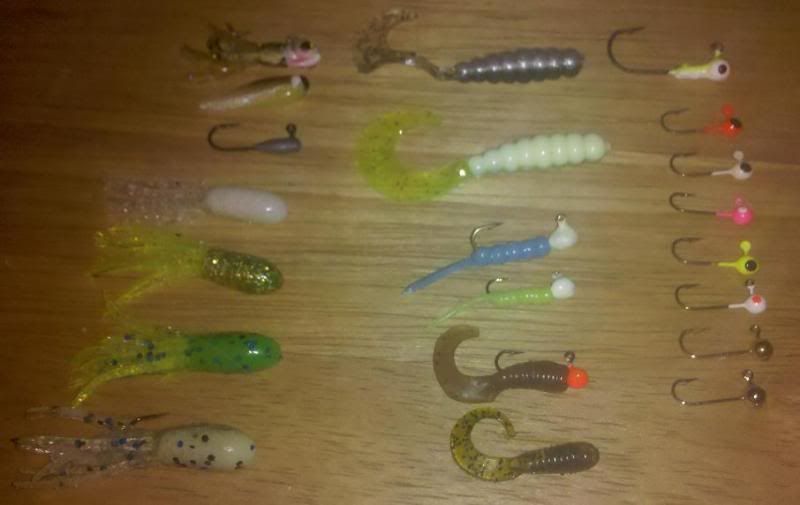
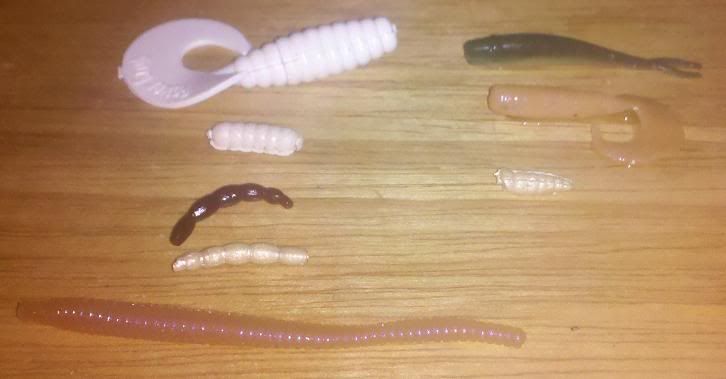
These non-scented soft plastic baits are among my favorites and have iced many a crappie, bluegill, or yellow perch.  The left column includes external tube jigs and insider head tubes.  The middle column includes twister tails or grubs, and Ratsos.  To the right are various colors and styles of jigheads used to rig these hot baits.
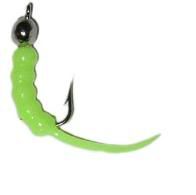
This lure is called the Shrimpo, basically,
it's a verticle version of the Ratso.
Make sure when rigging this lure that
you keep the tail rigged as shown, you'll
get more bites that way.
I usually carry tube jigs, grubs and Ratsos as my staple go to baits for non-scented plastics.  In addition to the Ratso, I carry Kalin's two inch grubs, Bass Pro Shops one inch Squirmin' Grubs and 1.5" Squirmin' Tubes.  These are very effective on the hardwater and in the soft water for virtually any panfish.

I also carry a box of various soft plastics designed for ice fishing that include such interesting critters as the Little Atom Wedgies, Nuggies, Duppies, Skimpies and Micro Noodles.  While you're ice fishing, if someone approaches you with the intent of giving you a Wedgie, don't run away, it may help you catch fish!  Another new group of soft plastics from the Reel Good Guide Store broke onto the scene and promise to fill ice anglers boxes with plastics and most likely their buckets with a limit of panfish.  These lures hail in the names of the Ice Mite, Paddle Bug, and GoJo.

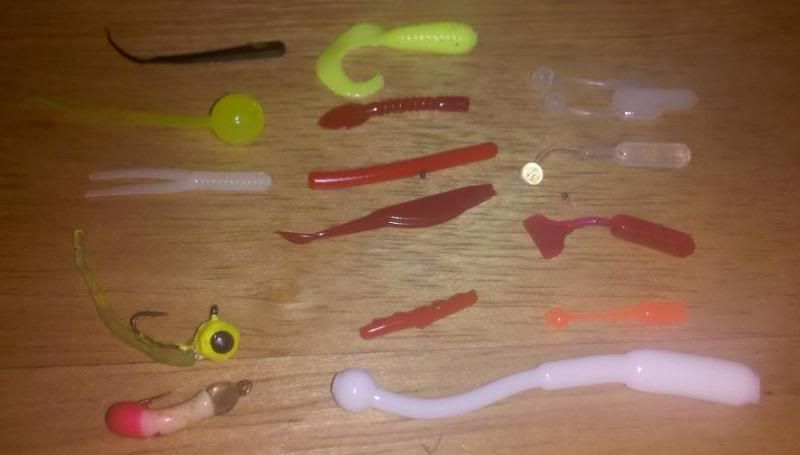
These plastics are carried in my "other" plastics box.  These are designed specifically for ice fishing, but can be used in open water with good success.  The top left and middle columns are soft plastics from the Little Atom company, while the column to the right are from Reel Good Guides.  The chartreuse jig to the left is made by a friend of mine, and the one below that is from Custom Jigs and Spins called the Purist.  The Purist is great in shallow water less than six feet.
There are other soft plastics out there designed for ice fishing or for open water panfishing, and the only thing that they need for them to work is for you to try them.  My advice is, that if you have confidence in a particular soft plastic when fishing for panfish during open water, chances are that they'd work under the ice as well.  I'm not loyal or biased toward any particular brand.  Rather, if I see something that I think will work, I'll try them.

So, what's another way to add some oomph to your non-scented soft plastic jig to further tempt finicky fish into biting?  Add scent.  There are many commercial brands of scent, including Fish Formula, Smelly Jelly, Bang and Berkeley Gulp juice to mention a few, and I'm sure that there are others.  Some people make their own using anise oil or cod liver oil as a base, then adding other flavors like garlic or other fish oils.  What works best?  I really don't know, but I use scent all of the time.  Scent, if anything, covers human scent and other things that might not appeal to the finicky taste buds of fish.  It's quite possible that fish might bite these scented lures because of the scent, but at a minimum seems to result in fish holding onto the bait longer.  That added time might be the difference between hooking up on a bite or the fish spitting the lure out.

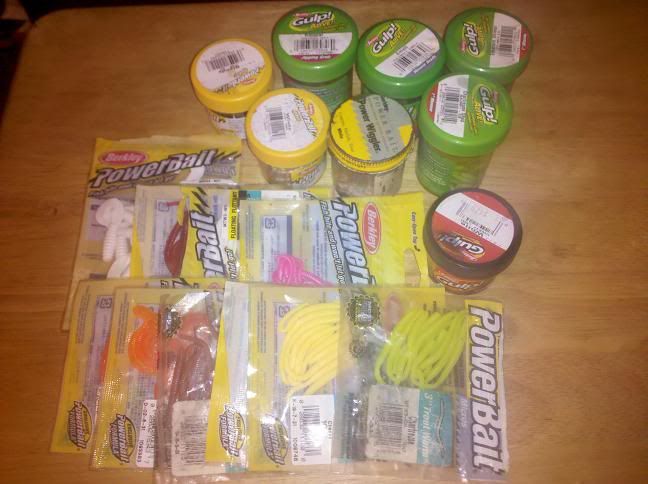
Scented Lures, which include biodegradable lures, are claimed by their makers to outfish live bait.  I can sometimes say that about any soft plastic, but there are times that these scented ones out perform anything else.  Probably the most popular ones are made by Berkley, but also Yum and Mr. Twister make versions that are very tempting to panfish.  I carry a good supply of Gulp and Powerbait products.
The column to the left are Berkley Powerbait products, and to the right are Gulp products.  The Powerbait products are as follows, Power Grub, Power Wiggler, Power Spikes, and Power Trout Worms.  The Gulp products are, top to bottom, Gulp Minnow, Gulp Grub, and Gulp Maggot.  These are awesome for finicky panfish.


Can you tell that I like Berkley scented products?  I carry these on every ice trip, and use them!
When fishing soft plastics, sometimes the bite can be easily detected, but most of the time the bites will be light.  Using a spring bobber or a very sensitive ultralight rod really helps to detect the bites.  The best way to detect bites is to see them.  During the daytime, in clear water, I use an Aqua-vu underwater camera when I'm over a good number of fish that I've marked with my sonar.  I can see them inhale the plastic lure and set the hook before they can spit it out.  Sometimes these fish bite so light that you can't detect movement on your rod tip or from your line, but with a camera, you can nail them. 
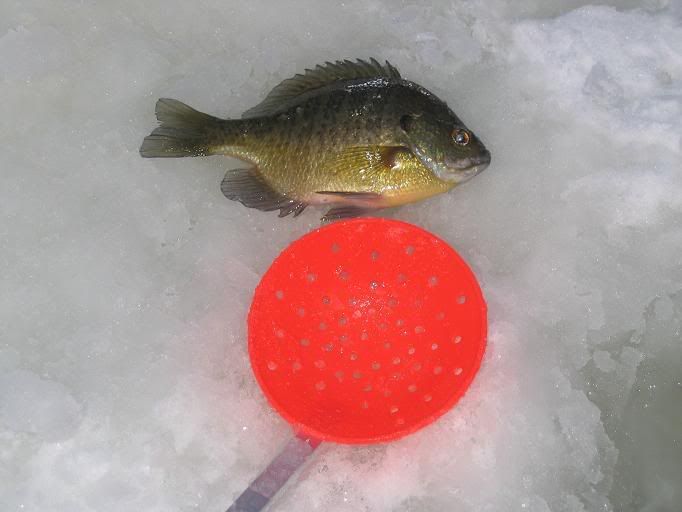
Bluegills like this one often bite so light that you can't see the bite on even a spring.  That's when a camera comes in handy, set the hook when you see the bite.  Some anglers when fishing shallow water, will "sight" fish by laying on the ice and peering down the hole.  This is the same principle as when using the camera.
Night Time Crappie
One of my favorite patterns of the Ratso tandem rig is the night time crappie bite.  The camera isn't much use at night, I've found, because there's so much zooplankton activity at night that are attracted to your camera light that it blocks out most of your visibility.  So, two things are key, your sonar and the spring bobber (or a very sensitive rod tip).

Before I go on, in my last post I gave a lot of credit to my buddy Jeff Redinger.  I have to give him credit here too, for turning me on to the Ratsos.  Since he pointed them out to me, I've caught a ton of fish on them.

OK, back to crappie.  The first thing to know is that, at least from my experience, crappie feed up.  What I mean by that is that they seem to respond to lures that are worked above them rather than on the bottom or below them.  That's not to say that they won't chase a lure down or hit them off the bottom, rather, they seem to be much more aggressive to lures presented above them.

Another trait of crappie, especially at night, is they almost always suspend.  If you're lure isn't where they can find it, then you won't get bites.  This is where a good sonar unit comes in handy.  As discussed in my last post, "On the Hardwater - Ice Fishing Basics I", you can see your jig or, in this case, both Ratsos, and you can see the fish.  With suspended fish, you know exactly what depth they are holding at because you can see them, so you can effectively drop that lure into your hole and jig it just above them.  Without sonar, you might drop the lure below them or fish too high, and the fish won't see it.

Crappie that bite "up" often push the lure up on their attack, creating slack in your line, resulting in your spring straightening out or moving up.  If you don't have a spring bobber, you need to really watch your line and make sure that any weird slack that all of a sudden appears is followed by a hook set, because that could be a fish!

When working the tandem Ratsos, most of the time the fish are focused on the bottom one.  When there's a thick school, you may see them surround both of them.  If you hook one, let it thrash a second or two and you'll often get a second bite, and you can catch two at a time that way.

 Using sonar, or a flasher, along with my tandem Ratso rig, allowed me to catch panfish for three hours non-stop on this trip.  I kept a few of them for a nice panfish dinner, the rest were released to catch another day.  My Ratsos have done this for me time and again.
How do I tempt them into striking?  First, the fish need to see the lures.  You've presented them because you're using sonar and you're keeping your lure slightly above them.  I also like glow colors at night, so I'm always using a light source to keep them "charged".  What I like to do is keep the jigs just above them, then lightly jig the lure and barely move it so that the Ratso tail is barely quivering.  As you do that, slowly raise, then stop, then raise, then stop and draw the fish up higher in the water column.  Eventually, they can't stand it and will hit before the lure escapes.  There are times when they may chase it all the way to the hole!  You really have to pay close attention to your sonar and watch their behavior.  When the fish finally are tempted to your lure and appear to be one with your lure on the sonar, take your eyes off the sonar and closely watch your rod tip for the bite.

Another thing to watch is when there's a thick school, after catching a fish, you may be in a hurry to get that lure back down.  So, you drop your jig in the hole and it's sinking then all of a sudden stops, and you may not see anything on your sonar.  That's usually due to one of two things.  Either it's hung on some ice frozen at your hole, or it's a fish swallowing your jig on the fall.  Set the hook.  Crappie are notorious for doing this.

What happens when the suspended school of crappie disappears?  They probably haven't gone far away.  The school is most likely nearby enough to see your jig but just outside of the cone of your sonar.  So, to get them back, jig your lure aggressively until they appear on your sonar, then go back to what you did earlier to get bites.

One more thing about using a spring with this Ratso rig, it really helps when it's windy to find shelter to fish.  For me, it's my flip over style Fish Trap, that allows me to fish out of the wind so I can easily see and detect the lightest of bites.

So, why do predators like crappie bite these micro sized plastics, especially at night when they feed so much on minnows?  These soft plastics, along with other ice jigs, are great for imitating small crustaceans.  Remember why I don't like the camera at night, because the zooplankton are attracted to the light?  Those are the critters that the crappie are feeding on at night.  Zooplankton become much more active at night, rising in the water column, and the crappie are right there with them.  See why crappie suspend now?  You can imitate them in your jigging technique, and it could trigger strikes.  What do they look like if you don't drop a camera down there, you might ask?  Well, just look into your hole.  The light from your lantern attracts them to your hole, and you can see copepods, amphipods, and daphnia flitting about in your hole.

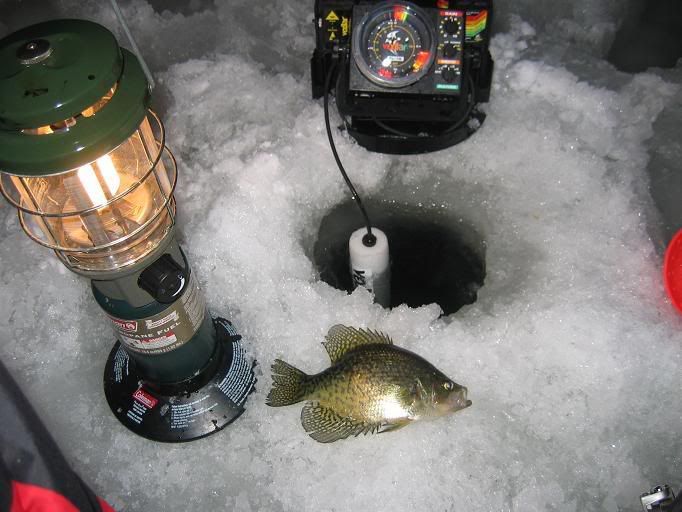
One final piece of important equipment needed for a good night crappie bite is a lantern.  I bring out a propane fueled Coleman lantern.  In my shanty, it not only provides a great light source, but helps keep it warm in there.  It could be in the teens outside and windy, but in my shanty I could strip down to a flannel shirt and be toasty as can be.  Lanterns are great also for charging up your glow lures.  I really believe that the light generated by your lantern attracts zooplankton, and the crappie are drawn there as well.  Just don't let your line get too close to the lantern, or you'll be retying a new rig (speaking from experience there).  Also, don't let it near the canvas on your flip over shanty or you'll be patching a hole prior to your next trip.

Before I forget, let me mention the advantages and disadvantages of using a swivel, as promised earlier in this post.  The swivel prevents line twist, and also adds a slight bit of weight which helps to load your rod tip when using light lures.  Line twist causes lures to spin.  Huh?  Well, when watching your lure with an underwater camera, if you jig any lure with spinning tackle, you will twist your line.  When you stop jigging, the line unwinds, and your lure twirls or spins under the water.  Fish will approach the lure and look at it, but most of the time won't bite a spinning lure and will eventually swim off.  Sometimes, but rarely, they'll wait for it to stop spinning and then bite.  You can reduce this twist by using a swivel, or, keep jigging the lure.  The lure won't spin as much if you keep it moving.  But if you have fish that will only hit whne you dead stick your lure, if it spins, you'll lose a chance at that type of bite.

The disadvantage of using a swivel is that it's another thing to see on your sonar, and sometimes the fish will actually bite it.  I've been tempted to put a small jig on it, but have never done that.  I wonder if it will work?  Hmmm...  Another disadvantage is that you have to keep changing your leader as you retie your jigs or change lures.  That's not a problem at home, but on the ice in the elements it's kind of tricky, especially with my old age and poor eyesight.  Oh, you're laughing eh?  Well, just wait until your my age and have to tie up a new rig with one or two pound test in a shanty in icy weather!  Obviously, the advantages outweigh the disadvantages.

Another thing that you can do with plastics is to use them to tip any of your ice jigs or spoons.  I really like doing that with the Berkley Gulp products, adding a Gulp Minnow Head or Minnow to a spoon can tempt bigger panfish or even bass, pickerel or walleye!
This Northland Buck-Shot Rattle Spoon tipped with a Gulp Minnow Head will not only tempt jumbo perch, but may put a nice walleye or bass on the ice for you.
Which leads me to my next topic, bigger plastics.  Bigger baits catch bigger fish, right?  Well, that's sometimes true with panfish.  If the common forage of a lake is larger, and fish are feeding often on minnows or crayfish, bigger soft plastics might work even better than the micro ones mentioned above.  You can really clean up on slob bluegills, slab crappie, and jumbo yellow perch by giving them something a bit bigger and more tempting.  I've caught jumbo perch and crappie while jigging three inch soft plastics.  When the fish are aggressive, sometimes your best catches can result from going big.

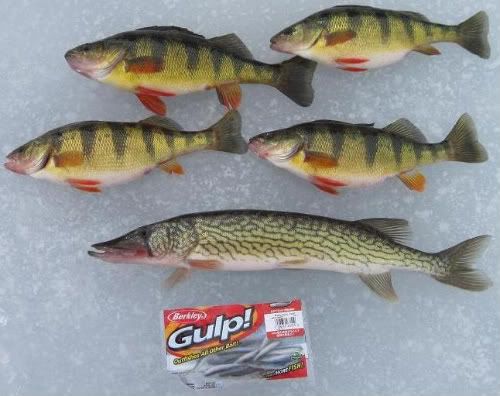
Bigger can be better.  These jumbo perch and a bonus pickerel fell for three inch Gulp minnows on a 1/16 ounce jighead.
So, next time you go out on the hardwater, have a rod rigged with your favorite soft plastic lure for panfish, and give it a try.  You may find that you may catch more than you ever imagined.  This isn't the only or always the best way to catch panfish, so make sure to bring what you're comfortable with out on the ice, but give these a try, you may be pleasantly surprised.  Think of soft plastics like you would any other time of year, as another tool to catch more fish, a tool that I never leave behind.

For more ice fishing tips, techniques, talk and fishing reports, please visit http://www.iceshanty.com/.

Saturday, January 21, 2012

On the Hardwater - Ice Fishing Basics Part I

Throughout the country in regions where favorite angling waters ice up to the point that people can no longer cast a lure from shore or a boat, many anglers pack up their fishing gear until next season and suffer what's known as cabin fever.  Other anglers welcome the ice, and look at it as an opportunity to catch fish in places that they can't reach from shore during open water.  In truth, ice fishing is almost cult like in it's following.  Many anglers prefer ice fishing to any other, often turning to other activities after ice out and not fishing the open water!  For most, it's a way to extend your fishing throughout the year, and for many of those, ice fishing becomes a favorite activity.

In this post, I'll discuss basic ice fishing equipment and some tactics.  In my next post, I'll go into more detail about the types of tackle used to catch various types of fish.

All you need to get started fishing the hardwater are a few basic items.  Once addicted though, like most fishing, the passion turns to an obscession, causing you to procure electronics and other gear to increase your catch or improve dealing with the elements, even more feeding the addiction.
Before I go on, if you're interested in giving ice fishing a try, or already are addicted to this awesome sport, make sure that you join and spend some time on http://www.iceshanty.com/.  There's a wealth of information on this website.  Make sure that you use the search feature to find what you need.  Not only will you find tons of tips, but after your third post, you'll have access to fishing reports for just about everywhere in the US and Canada.  And, on top of that, you may wind up meeting some people to fish with.  I met a bunch of my fishing friends as a result of this website.  Join, learn, and contribute.

So, what do you need to get started? 
First and foremost, you have to protect yourself from the elements, because without them, you wouldn't have ice to fish on to begin with.  So, if you're going to be out there, it's important to not only be comfortable, but to be safe.  I'm not going to go into much depth on dressing for ice fishing other than to say that it's best to dress in layers with material warm enough to handle extreme temperatures, to keep your head and hands warm, and to have a good warm pair of boots.  Click on this link for more information on how to dress for ice fishing, and browse through the topics to read how ice anglers dress to deal with the elements:  Iceshanty.com Dressing for Ice Fishing Forum.

A simple sled will haul your gear, or you can modify it to
carry just about anything that you want.  It's all up to your
own imagination.
Next, you'll need some equipment.  The founder of Iceshanty.com posted a quick list of equipment that I've found useful to newbies, you can find the list here:  Iceshanty.com Recommended Equipment List.  Again, I won't go into great detail here, but basically, in addition to dressing for the occasion, you'll need something to cut through the ice (most people use an ice auger), something to scoop out the ice chips from the hole made by your auger, one or more ice fishing rods and reels, light fishing line suitable for cold water, ice cleats to keep you from falling and injuring yourself, something to sit on (a bucket works great and doubles as something to haul your gear or catch), some small ice fishing lures or jigs, and some bait to sweeten your jigs.  Once you accumulate more gear, a sled of some sort to haul your stuff a round will make things even easier for you.

Cutting through the ice:
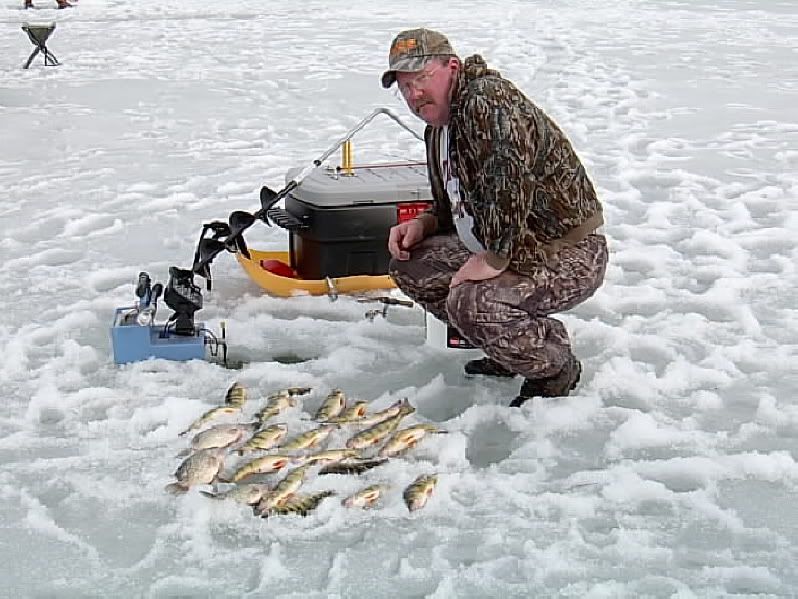
Leaning against my sled is a hand auger.  Other equipment
shown here include my sled, sonar, fishing rod, a tool
to scoop out ice chips, and my catch.
The most basic piece of equipment is the ice auger.  It's basically like a drill to cut holes in the ice which allow you to present lures or bait to the fish under your feet.  There are gas and electric powered augers that are great when cutting through thick ice, and hand augers for not so thick ice.  In my neck of the woods, the ice doesn't really get all that thick, so a hand auger will suffice most of the time.  Gas powered augers are great for cutting a lot of holes in a hurry, and will save time and energy over a hand auger when the ice is at it's thickest.  In more Northern regions, sometimes you need an extension to be able to cut holes through several feet of ice.  In my region, I rarely see more than fifteen inches of ice.

When the weather is nice, you may opt to go light and bring less equipment.  But, when dealing with harsh weather, additional equipment will keep you comfortable.  And, when you're comfortable, you'll catch more fish.  It's really difficult to concentrate on catching fish when you're cold, shivering and on the brink of hypothermia.  There are times when simply dressing warmly isn't enough.  So, what do ice anglers do?  Fish inside.  The ice shanty is the means to comfort, a shelter to protect you from the elements while still having the ability to catch fish. 

The Permanent Shanty:
In regions where it's legal to leave a protective shelter on the ice, some anglers build their own, often elaborate and innovative contraptions and haul them out on the ice.  They are often left in a favorite area of their favorite lake where they can fish each day within their structure, or use it as a base camp to spread out and find fish, then return to socialize, eat food, and/or fish.  Permanent shanties are used in colder regions where the ice is thick enough to drive on and support a lot of weight.

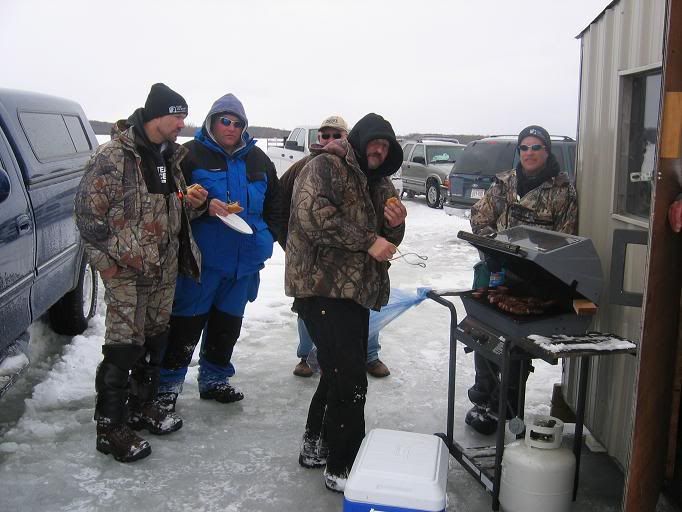
Permanent shanties, or shacks, offer all the comforts of home.  Not only do they offer comfort inside to fish from, but often serve as base camps for social gatherings on the ice in between fishing time.  Here, my buddies share a meal after a long cold morning on the ice.
The Portable Shanty:
When the ice isn't thick enough to drive on the ice, or, if it's not legal to drive on the ice, ice anglers are not out of luck when it comes to comfort.  There are many products available to the angler to protect them from the elements.  It's not essential to own one of these, but man they sure help.  I personally fish out of a Fish Trap, a portable "flip-over" shelter that serves as my sled, seat, and shelter, made by the Clam Corporation.  Not only am I protected from the elements, but I can fish in comfort and remain mobile to stay on the fish.  They're fast and easy to set up on the ice, and keep me warm and out of the wind. 

An advantage to my Fish Trap over other styles of shanty is that I can stay mobile.  All I need to do is flip the canvas back and move the sled to another spot (usually a hole that I've cut previously), have a seat, and flip the protective canvas back over top of me and I'm in fishing comfort once again.  The Fish Trap is often referred to as the "bass boat on ice".

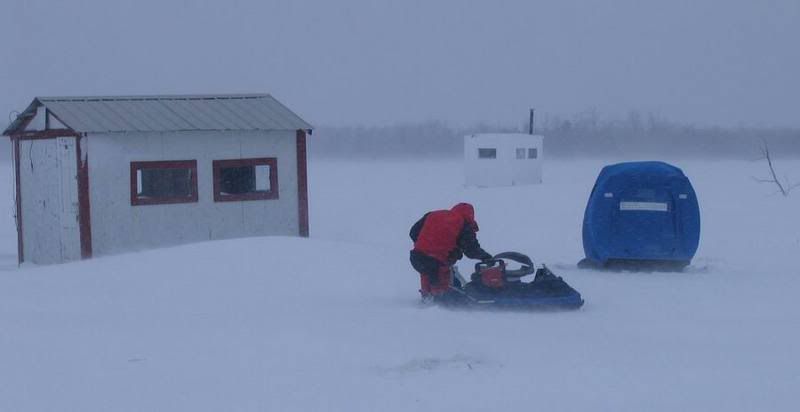
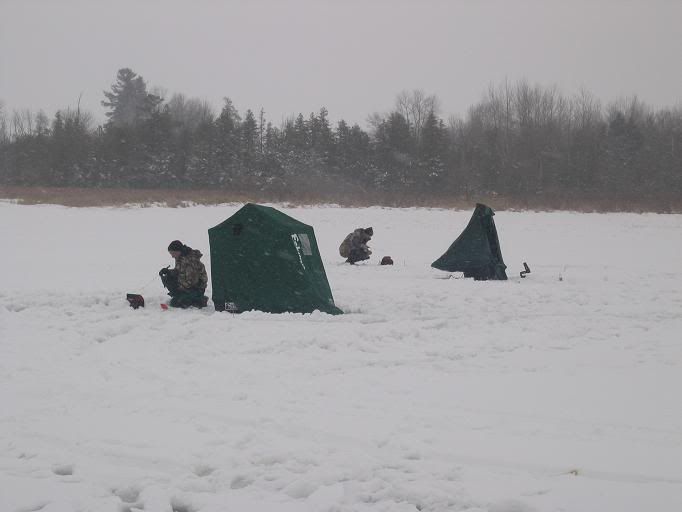
In this pic you can see a couple permanent shanties along with two flip over style portables.  Here, I'm searching for a new spot, checking holes for fish, while a buddy of mine is cozy inside his Fish Trap.  It was cold, snowing, and the wind was howling that day, expanding the canvas Fish Trap canvas tops to resemble giant blue marshmellows!
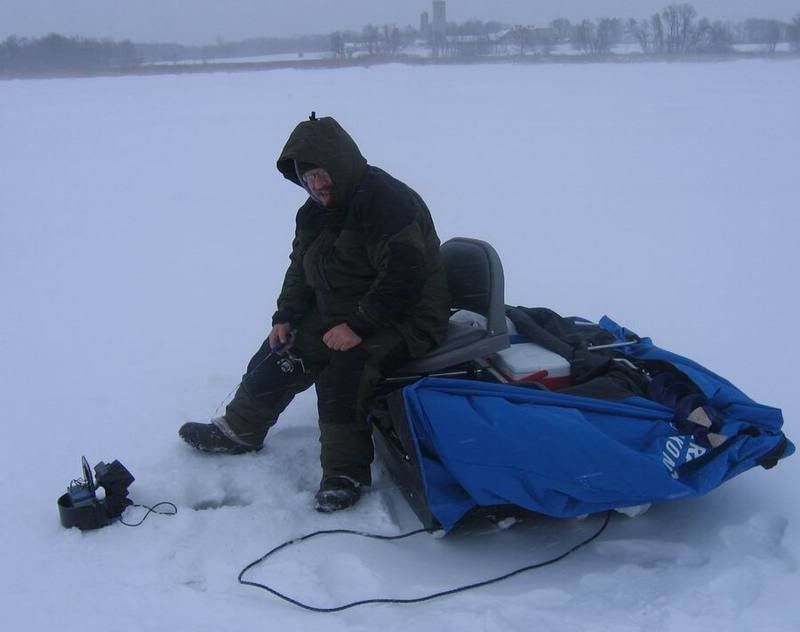
Here my buddy George is perched on his Fish Trap Seat, using his flasher to catch panfish.  You can see why people call these portable shanties "bass boats on ice".  All he has to do to escape the elements is to flip the top over his head and he's in total comfort.

On average ice fishing days, the sun and your body warmth will keep you plenty warm inside your portable shanty.  At night, if you're fishing for crappie and other night biters, a propane lantern will not only provide you with ample light, but also generate enough heat to fish inside your portable shanty to the point that you can peel off some layers and fish in a flannel shirt on all but the coldest of days.  For those really cold days, a Mr. Heater Buddy portable propane heater will keep things toasty inside.  Don't worry about these items melting the ice that you're perched upon, they're perfectly safe.

Portable shanties, like these "flip-over" styles, allow you to fish out of the wind and protect you from the elements, keeping you comfortable even on the coldest days.  The only time that you need to venture outside is if you're searching for fish and need to move.
Cozy in my Fish Trap, warm from my lantern and Mr. Heater Buddy heater, electronics to help find and catch panfish like this crappie...what more do you need?  I love it!

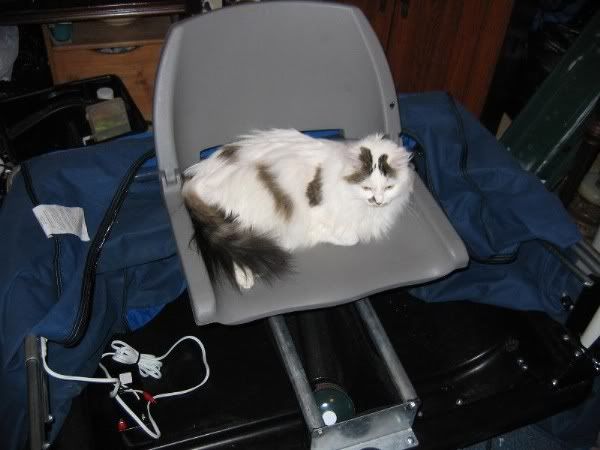
Here my cat demonstrates how to properly use the bass boat style seat on my fish trap while I prepare for a trip.

There are other portable shanties available, some are "pop-up" type shanties that set up in a few minutes.  They aren't quite as mobile as the flip over style, but are great when fishing with multiple people or to serve as base camps when fishing a wide area.  These are very popular with tip-up fishermen. 

Here's an example of a "pop-up" style portable shanty, with a permanent shanty in the background.  These are also a bit roomier than the "flip-over" style of shanty if you prefer more elbow room and aren't worried about mobility.  Notice the gas powered auger at the bottom of the picture.
Ice Fishing with Electronics

Sonar
Probably the most important piece of equipment for me to locate and catch more fish is my sonar unit.  There are many brands and versions out there, all of them good, and all of them serve one purpose, to locate and help you catch more fish.  How does it work?  Basically, you place the transducer down the hole, and you'll see bars on your screen (see picture below).  The thick bars at the bottom of the picture (six o'clock) represent a "false" return, but the bars at about four o'clock represent the bottom.  Not only can you see the bottom and know the depth that you're fishing, but bars that show up at the bottom and "flicker" or that are suspended above the bottom, are fish. 

When you drop your lure down, it will also show up as a bar.  Often, if the fish are active, they'll react to your lure as it falls down to them.  You can see, in real time, every action that you impart on the lure.  As you jig, you can see your lure jump and the fish react.  When a bar, or fish, approaches the bar that represents your lure, take your eyes off the sonar and watch your rod tip.  When you see your rod tip, or sometimes just the line, do anything different, set the hook.  Sometimes the strikes are savage, but most of the time they're very subtle.  Don't forget to take your eyes off the "TV" (sonar) or you may miss that bite.

Do you need sonar to catch fish?  Nope.  But wow does it help.  It often is the difference between getting skunked and catching a ton of fish.  Once you get into ice fishing, this is the first major investment that I'd recommend.

Sonar, like the Vexilar FL18 pictured above, allows you to find fish, but also to see your lure, the fish, and how they react, enabling you to catch more fish.  When fishing for crappie at night, sonar is invaluable in finding suspended fish, and dropping the lure right above them to provoke a strike.
Underwater Video Cameras
Now I don't think that these are essential to ice fish, but let me tell you it's very fun to see what you're fishing for.  And, when the bite is really light, you'll find that using a camera is a great way to catch those light biters that you might miss if you didn't actually see the fish inhale the lure.  Fish often inhale a lure and spit it out so fast that, by the time you see your rod tip jump and react, you'll miss that fish.  And, often, the fish inhaling your lure and spitting it out may not even transmit the bite to your rod tip!  So, with this piece of equipment, you can not only see what you're fishing for, see how they react, but you can actually see them inhale your lure.  In this case, you leave your eyes on the camera and react to what you see on the camera, and set the hook. 

The use of an underwater camera is a great way to fish when you know that you have a lot of fish under you.  They can also be used to find fish and are quite valuable in that respect when searching in shallow water.  Why?  Sonar puts out a cone of waves that are read back to the unit after bouncing off the bottom.  The radius of the cone is much smaller in shallower water, so you're only seeing what is directly under you.  With a camera, in clear water, you can see many feet off to the side in any direction that you point the camera. 

Another great thing about these units is that you can record your underwater fishing moments on a DVR.  I currently use an Aqua-vu, one of the first portable underwater cameras built for ice fishing, but there are several quality brands out there to choose from.

So, in addition to the above facts about using an underwater camera, why do I use them?  I think that they're just plain fun!

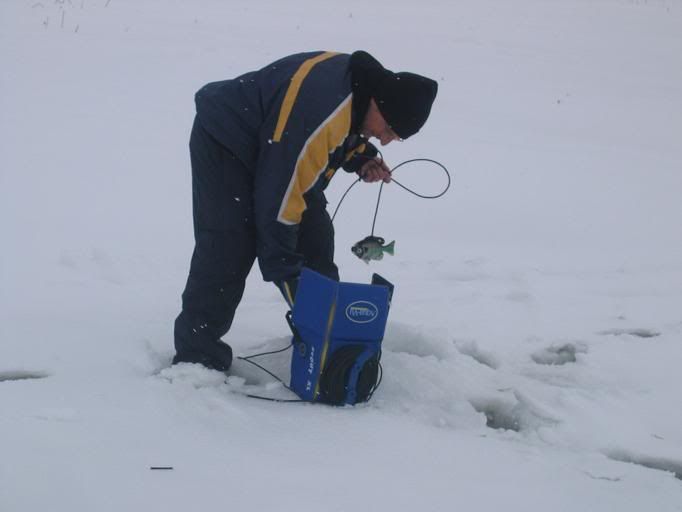
Here, my friend Scott uses an underwater camera to find schools of bluegills in just a few feet of water, checking several holes until he locates fish.
Tactics and Strategies 
I'm not going to go into specific tactics with regard to fishing tackle and the various fish species available to you through the ice in this post as I'll save that for future posts.  But instead, I'll touch on some overall strategies that will help you improve your odds and find more fish.  Most ice anglers employ two basic tactics, jigging for fish, or setting up tip-ups.

Jigging
Jigging simply means that you sit or stand over your hole in the ice, and work your lure with a rod and reel in hand to catch fish.  It really doesn't get any simpler than that.  But, if you think that you can venture out on the ice, cut a hole, and find fish every time, well, it just isn't that simple.  That said, it does happen once in a while, and that's just plain luck.  So, how do you rely on something other than luck and improve your odds at success on the ice?  Cut and check lots of holes, and stay mobile.

I usually start out and find a spot that I want to fish by looking at lake maps, or even on-line satellite imaging, to determine a section of lake that I'd like to fish.  Once I locate and access the area, I begin by cutting about several holes out from where I'd guess the first drop off is out to the creek channel.  Then, I go back and scoop the ice chips out, and drop my sonar transducer down the hole, turn on my sonar, and look for either suspended fish, or the bottom bars flickering and moving. 

Be careful that your transducer is still because that flickering on the bottom could be your transducer moving.  If you're transducer is still, and the bottom bar is flickering, try dropping a jig down to the fish and see if they react.  If what you see is a fish, then this is a hole to remember.  If you see multiple fish or they're reacting to your lure in an aggressive manner, stay and fish it out.

Here my friends Jack and Geoff found a school of panfish using their sonar units, then targeted them using light line, ice fishing rods, and small jigs tipped with maggots (spikes) or waxworms.
You may check all of the holes that you've cut only to not find any fish.  If that happens, move to another section of lake and start over.  Repeat the process until you locate fish.  Don't give up!  And, if you find fish and they stop biting, get up and move, and repeat the process once again.  If you do move, then remember where you've fished and caught fish successfully, because later on you may want to return to that spot.  I've often found that if you catch a crappie during the morning, more than likely if you plan to fish at night, that spot could prove to be a good night time crappie location.

If you've been on fish, make small location changes and look for similar structure.  If they completely shut down or you can't find fish, make major location changes.  That may mean traveling to a different section of the lake that you're on, or even heading off to a different lake.

The only thing that I want to say more about mobility, is that when night fishing for crappie, I've had less success moving to new spots.  I can't say that it won't work to move, but it may not be as easy as finding them in the day.  Be prepared to cut a lot of holes at night to find feeding crappie.  It's hard work, but when you find active ones, you will be rewarded.

Now, for me, being mobile is limited to what I bring on the ice.  This is where the Fish Trap is great because I can haul all of my gear and get out of the wind and weather, and move whenever I need to.  If it's warm out, I may opt to bring my smaller sled and go light, and be even more mobile.  But, in my area, on most of the lakes that I fish it's not legal to drive any vehicle on the ice.  On some larger lakes near me, snowmobiles are allowed, and they increase your mobility.  Of course, in more Northern regions, use of ATVs, snowmobiles, automobiles and trucks can also increase your mobility.

The concept of being mobile and fishing with electronics to locate and find fish quickly was made popular by Dave Genz many years ago.  I'd recommend checking his youtube videos on the subject.  He goes into a lot more detail than I have time for today.

Tip-Ups
Another tactic that ice anglers use is to cut a bunch of holes in such a way that they cover a structure, or structures, to target a certain species of fish, and set up multiple baited tip-up devices on them.  They can be used to catch any predatory fish, whether it be pike, musky, walleye, pickerel, bass, trout, crappie or perch.  A tip-up is simply a spring loaded device that has a spool of line and sits over a hole, where you set your bait to the depth of your choice, that has a flag that sets itself off and notifies you that you may have a bite.  The number of tip-ups that you are allowed to use depends on the regulations for your state or province that you fish.  Often, several anglers together will set up sets of tip-ups and work them together to increase their odds. 

Here's a nice Northern pike caught on a tip-up on a large shiner.
Basically, when a fish bites, the flag springs into the air, anglers quickly head toward that hole and check to see if it's a fish by first observing the line to see if it's coming off the spool, and then by picking up the line and feeling if the fish is there.  Once the angler determines that a fish is indeed on the other end of the line, the angler sets the hook and brings the fish in hand over hand.  If it's a big fish and you need drag, then you simply reverse your hand over hand activity.  Once the fish is at the hole, the trick is to maneuver the fishes head into the hole, then grab it and haul it onto the ice.  Sometimes it's necessary to use a small gaff for large toothy fish.

So, what about mobility and tip-up use?  You may not be quite as mobile as the jigging/moving tactics described earlier, but you can still use the same principles.  You can use sonar to find likely spots and even fish.  You can change locations if you aren't getting any action, or simply cut more holes in a productive area and anticipate where the fish may be based on your recent activity.

Tip-ups are very effective for catching large predatory fish.  Most of the time bait is used, but some tip-ups have built in features that impart a jigging action, which allows for the use of lures which can be effective.

Safety on the ice:
Folks that don't know much about ice fishing, particularly in warmer regions like mine, often question my sanity for going out on the ice.  Is it dangerous?  Yes, it can be, if you don't take precautions and know a few things about ice and ice conditions. 

In a nutshell, I follow several basic rules that I learned from my mentor, Jeff Redinger.  In early and late season, when ice is the most questionable, approach from the Southern shorelines, or areas that get a lot of shade.  Northern exposures receive the most sun, and therefore are the warmest and first to melt. 

Do some research ahead of time to determine if there are springs on the lake.  Springs often generate warmer water and/or currents that can erode ice and make it unsafe.  Avoid those areas.

Stay away from narrow points, bridges, creek mouths, or any other areas where current occurs.  Current can erode ice and make it unsafe.  In addition, very windy areas can erode ice too, so be aware of that.

Avoid wood sticking out of the ice.  Wood absorbs heat, which can thin the ice around the wood.

Sunny rocky areas or boat ramps at the ice edge can be tricky, if it's shady, you may be OK, but be careful when you access.  If the edges look soft or there's open water nearby, be suspicious and check it before walking out on it.

Use a spud bar to travel across the ice a step or two at a time, testing the ice with a spud bar to check the ice ahead of you.  If the spud bar goes through the ice or significantly cracks it, the ice could be too thin to move ahead.  Back away and move in a different direction.  Also, every now and then when moving, cut test holes and check the thickness.

Wear ice cleats, studded boots, or creepers when walking on slick ice.  I'd say that most ice fishing injuries are a result of someone falling down on the ice.  Let me tell you from experience folks, it hurts.  Not only can you give yourself a concussion, but you can break a limb too.

Carry safety equipment with you when the ice is iffy.  Wear ice picks or carry Phillips head screwdrivers to use to help pull yourself out if you unfortunately fall through.  It's a good idea to pack a forty foot length of rope with you too.

Be aware of the changing weather conditions around you.  Wind, rain, and warm weather can combine to erode ice quickly and change "safe" ice to dangerous ice in a hurry.  A good sign that this is happening is running water on top of the ice, swirling around in your hole.  When that happens, check the ice thickness often.  If the ice is sufficiently thick, you should be OK, but if not maybe it's best to try another area.  This can be difficult especially on a good bite.

Generally, my rule of thumb is four inches of clear or black ice, or newly formed ice, is OK for me.  Any less than that and I won't go out and fish on it.  It's not worth your life for a few fish.  Clear ice is the strongest ice and is most common early in the season.  If it's cold, and ice is building, it will crack and make booming noises.  Often the cracks will form right between your legs, and sometimes when you walk.  If the ice is sufficiently thick, this is not a problem at all but is kind of scary to ice fishing newbies.  To me, the booming noises are comforting to me, letting me know that ice is building underneath me.  The cracks are due to ice forming, created by the pressure on the ice against the shorelines as it forms.  They're only dangerous on thin ice, so once again, check often by using a spud bar or cutting holes with your auger.

Ice that is eroding has a white appearance, and is very granular when you cut a hole, almost looking like you're cutting through a snow cone.  Even a foot of "honeycomb" ice isn't safe and may not support your weight.  This type of ice occurs later in the season mostly, but can happen any time due to rainy weather conditions.

My friend Glenn jigging on four inches of clear ice.

Fish with a buddy, always a must for safety.

Be careful if a lot of snow is on the ice.  It has to be thick enough to support the weight of the snow and you.  Four inches of clear ice with snow on top isn't too bad, but any less ice than that is very risky.

By the way, I've been ice fishing for a long long time and have never fallen through the ice completely (knock on wood).  I've been fortunate, but that's because I'm extremely skeptical about ice and always check it when I'm moving about.  But I've had friends that have fallen through.  Most of the time it's due to fishing late in the season when the fishing is extremely good, but the ice is most eroded and risky.

Also, be careful around your ice auger blades.  They should be very sharp but also watch out for them.  They can give you a nasty cut if you don't pay attention.

There's a lot more to safety on the ice and I can't cover it all in one blog post.  Please research this topic on your own thoroughly.

For more safety tips, please check the following links:
http://www.iceshanty.com/ice_fishing/index.php?board=199.0
http://www.iceshanty.com/iceshanty/ice_fishing.php

Catch and Release, or Keep?
I practice catch, photo, and release most of the time when fishing open water.  Rarely do I keep fish except for a few occasions.  But I tend to keep more fish when I ice fish.  I don't know, they just taste great to me.  That said, most of the time I fish for fun and don't feel like coming home late to clean a mess of fish.  So, I release them sometimes.  When catching fish through the ice, if in a shanty, you can simply drop them down the hole.  If you plan on keeping them, they'll be fine as long as they don't freeze.  Fish taste better when they aren't frozen before being cleaned.  They're still edible though, so don't waste them if they freeze.  Just take them home and filet them after they thaw out, and cook them.  It's probably not a good idea to refreeze them.  Often, if it's not too cold, fish on the ice will mark my good holes, and when I bounce from hole to hole, it's important that I remember which holes are productive.

If it's below freezing and a fish is exposed out of the water, it will freeze.  Obviously, if you plan on releasing the fish, don't let this happen and return it to the water as soon as possible.  If you plan on keeping them, don't let them freeze either.  How?  You can keep them in a covered bucket, and even better, throw some snow over top of them to insulate them.  No snow available?  Scoop up your ice chips left behind from cutting your holes.

Why Ice Fish?
So my friends that think that I'm insane often ask me why I ice fish.  Why not just go to the store and purchase my fish?  It's not about the fish.  It's about solving the puzzle, about friendships on the ice, about the experience, about the beauty of winter.

One of the great things that distinguishes fishing the hardwater over fishing the softwater is that you are over the fish, and there is no drift.  This is why you can see your lure so easily on sonar.  This is why, once you find fish, you can often find and catch a lot of them. 

Another great thing about ice fishing is that, combined with joining Iceshanty.com, is that it's a great social activity.  I've met a lot of nice people on the website and on the ice, and many of them are my friends.  It's a great way to share and learn about ice fishing, but a better way to enjoy life.

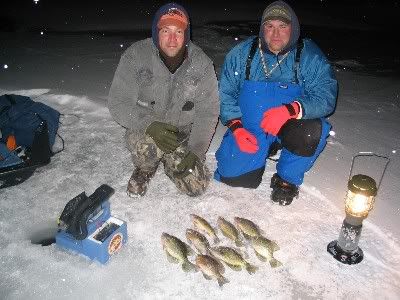
My Brother Kyle and my friend Mark, posed over some nice iced crappie.
I'd like to thank my friend and ice fishing mentor, Jeff Redinger, a.k.a. ratsotail on Iceshanty.com, for teaching me the basics of ice fishing, and other fishing strategies on the hardwater.  He really is a master on the ice.  I owe a lot to you buddy!

In my next post, I'll discuss ice fishing strategies specific to jigging for panfish.

For more info on icefishing, make sure that you join and post on Iceshanty.com and visit Bass Junky's blog posts.  He recently posted some great ice fishing posts amongst many other great topics.  You can find is blog at http://bassjunkiesfishingaddiction.blogspot.com/.