Thursday, March 28, 2019

Spring is Here: Time to Break Out the Lipless Crankbaits

Ah, spring is here in the D.C. area.  The cherry blossoms are about to bloom, the forcythias are in bloom, the buds on our trees are about to pop, the robins returned, blue birds are flirting with each other, fish of all species are on the feed, and my lipless crankbaits are screaming out to me.  Not too many fishing patterns get my blood pumping more than when big fish munch on lipless crankbaits.
Not only can you catch good numbers of fish on lipless crankbaits, but big ones too.  This one fell for a Bill Lewis Rat-L-Trap in the Chrome Blue Back color.
In our tidal rivers, blueback herring run into the skinny waters while largemouth bass, chain pickerel, and striped bass wait in ambush.  Upriver, our smallmouth bass are on the feed.  And, in local lakes and ponds, golden shiners swarm in the shallows, with predatory bass and pickerel ready to attack them for a tasty meal.
My friend Brad with a nice tidal largemouth bass that fell for a lipless crankbait.
One of the best types of lure to offer these predatory fish are lipless crankbaits.  I don't know if it's the vibration, rattling sound, or flash that drive these fish nuts enough to attack, or if it appeals to their extreme urge to feed prior to a rigorous spawn.  I've heard arguments about both.  But, seriously, when they're attacking these crankbaits, it doesn't matter why, just that they're hitting.
Largemouth bass love lipless crankbaits, or hate them, depending on your view of why they attack them so violently.
It's true, that I've seen fish come from a long way to hit these lures.  Stripers are notorious for chasing down baitfish at high speeds.  Largemouth bass are known to have extremely quick ambush attack speeds, but can also chase down a quickly retrieved lipless crank.  Why?  Like I said, who cares?  Just that they do it, but honestly, it could be a combination of reasons.

Lipless crankbaits provide plenty of vibration that can be detected by an extremely sensitive organ in fish called the lateral line.  When predatory fish sense these vibrations, the vibrations could provoke them into striking whatever is making them.  Also, this extra sensitive organ allows fish to hone in on these lures from long distances away.  The rattles in these lures could appeal to a feeding response, or just tick them off.  At any rate, most of these lures have a loud rattling sound, teamed with their tight vibration, designed to trigger strikes.  And, they most certainly do that well.
Gotta love what I call "trappin'" bass.  Mark fooled this nice bass on a lipless crankbait.
Whether you're fishing various colors or metallic finishes, most of these lures provide a measure of flash that could trigger strikes.  I love the metallic finishes when skies are bright or if I'm fishing clearer water.  Bright colors, like chartreuse, are great for fishing dingy water or dark days.  In fact, dark colors also work well in those conditions.  The action of the crankbait is key though, as the tight vibrating wiggle provides a flash that mimics their prey.  This feature could also trigger reaction strikes or appeal to their feeding urges.

For anglers, these baits are attractive because you can fish them so many ways.  You can just toss them out and crank them in.  You can cast them out and jig them back, or fish directly below the boat in deep water and vertical jig.  You can cast them out, let them sink, count them down, and fish them at any depth you desire.  Or you can fish them slowly across the tops of weed beds and rip them off the weeds (more on that later).  How much more versatile of a lure is there than that?
There are many ways to fish these crankbaits.   This pre-spawn Great Lakes smallmouth bass slammed a deep, slowly cranked lipless crankbait.
One huge advantage to fishing this type of lure is that they cover a lot of water quickly.  They're great search lures, especially when fishing new lakes.  They're perfectly designed for finding for schooling predatory fish, or perhaps fish ambushing baitfish on a windy point.  When the fish are on, you can catch good numbers of them on these lures for this reason, and not only that, potentially big fish.  They're big fish baits!
You cover water with lipless crankbaits to find chunky largemouth bass like this.
So, for those out there who don't know what a lipless crankbait is, they're basically a type of plug that is about a half inch or less in width, laterally compressed (almost flat), that sink on the fall, and don't have a lip like other crankbaits do.  Most of them have some sort of rattling system inside them.  The line tie is at the top of the "head" of the lure.  All of these features make them unique.

There are many brands out there, most of them produce well.  We all have our favorites.  I fish several different brands, because each one has a slightly different presentation, but they all have similar traits mentioned above.  I like the Bill Lewis Rat-L-Trap, Rapala Rattlin' Rap, Strike King Red Eyed Shad, and Yo-Zuri Rattl'n Vibe.  Each has their place in my box.  I carry four different sizes, depending on what I'm fishing for, being 1 oz., 3/4 oz., 1/2 oz. and 1/4 oz.  There are other brands that probably work just as well, but it's up to you to find your favorites.

If I had to say that I have a favorite or "go to" version, the first one that I tie on, one that catches just about any predatory fish, it's a 1/2 ounce Bill Lewis Rat-L-Trap.  I love the Chrome Blue Back color when fishing our tidal waters, as I feel it resembles the blue back herring.  Maybe it does, or maybe it doesn't, but that thought gives me confidence that this will work, and it usually does.
Shad and blueback herring run up river to spawn in the spring.  Lipless crankbaits are great imitators of these baitfish.  I like the Chrome Blue Back Rat-L-Trap for this purpose.  Nice largemouth, like this one, stripers and other predatory fish feast on them, and will do the same on your lipless crankbait.
For lakes and ponds, I love the Gold Black Back color this time of year.  I think that they resemble golden shiners, and in tannic acid stained waters, maybe resemble shad as well.  That said, there are other colors that could be effective in other situations or water conditions.  The colors mentioned above work best for me if there is about two feet or more visibility.  Truthfully, I think that color is the least important feature, except perhaps the metallic finishes, because they provide a lot of flash, as do baitfish.
This chunky largemouth fell for a Gold Black Back 1/2 ounce Rat-L-Trap.  There are plenty of golden shiners in our lakes, so if your lakes have a good population of them, try the gold "trap".
Chain pickerel love the golden shiner imitation as well.
So, how do you fish them?  Like I said above, there are many ways to fish lipless cranks.  But, in spring time, which is the focus of this article, I'll mention my favorite pattern for largemouth.  During spring, some weeds are beginning to grow, while others have already been growing and are now filling in, and these weeds attract baitfish.  Equally important, is that weeds provide ambush cover and break up the silhouette of predatory fish on the bottom.  Most predatory fish, like bass, are dark on the top, and light underneath.  So, when they sit on the bottom in wait, they blend in with the weeds very well.  When cover like this attracts both predators and prey, it's a fishing hot spot.

In this situation, I try to fish just over the top of the weeds and let the treble hooks tick the tops of the weeds.  When the lure gets to the edge of the weed bed, I let it drop and flutter down, then rip it up and crank it back.  Often, when bass fishing, ripping a lure like this off the bottom will trigger strikes.  Also, lures that flutter down over weed bed edges could provoke a predatory fish hiding below.  As the crank flutters down, the fish think it is an easy meal, and attack it on the fall.
Steve will tell you that fishing over the top of weed beds with lipless crankbaits will catch big bass, and here's the proof!
When fishing over top of the weeds, your lure will hang up on weeds occasionally.  Don't just reel your lure in and clean it off.  When that happens, as long as it isn't a thick mat, rip the lure from the weeds with the rod tip and continue fishing the lure.  As with ripping a lure off the bottom, ripping one off weeds may also provoke vicious strikes from largemouth.  Again, the flash, vibration, and darting action of the lure when ripped off the weed is key, I believe, to provoking bass into striking.  This is the pattern, really.

How do I keep a sinking lure above the weeds?  I keep my rod tip up when reeling, and if the weeds are a foot under the surface, keep it higher.  This also allows you to reel in the lure a little slower, and I feel, making the lure more attractive to bass.  If you do this while keeping your rod tip down, you will have to fish the lure much faster to keep the lure up enough, or you will bury your lure in the weeds, leading to frustration and less productive casts.

I prefer using a long, fast action baitcasting bass rig for this, with braided line.  I used to use fluorocarbon line, and that worked well too.  The low stretch lines and long, fast action rods enable you to keep the lure above the weeds, and to rip the lure off of the weeds and clear it, while also provoking fish to strike.  My pitching rod and reel work great for this technique.
This largemouth, and countless others like this, were caught on the weed pattern described above.
Striped bass, or stripers or rockfish, as they call them in my neck of the woods, love lipless cranks too.  You can fish them any number of ways, but if I had to say one thing about them for stripers is that they like them fast, and they like erratic.  So, crank it in, let it stop, rip it, then crank as fast as you can, then rinse, repeat.  Stripers can out swim your lure no matter how fast you reel, if they want it.  That said, if they're deep, you have to let it sink down there so they can see it first.  That's the beauty of these lures, really, their versatility, and that they simply catch fish.
My buddy Bob with a nice striper that he caught on a 1 ounce Rat-L-Trap.

Carson (left) and his Dad, Bob, with a nice chainside caught on a lipless crankbait.  This time, the fish fell for a 1/4 oz. Rat-L-Trap in the Chrome Blue Back color.
The lure shape resembles a shad remarkably well.  When you think about it, they could resemble just about any form of baitfish as long as the predators don't have much time to examine the lure.  Perhaps that is why these lures are so effective?
Shad, like this one, are abundant in our rivers, and in some of our lakes and ponds.  Lipless crankbaits are great lures that mimic these baitfish.   Lipless crankbaits match them in size, shape, flash, and even action.
I fish the larger sizes for larger predators, like stripers, pike, and even musky.  I prefer the half once size for bass, but there are times when the 1/4 ounce size is necessary.  The 1/4 ounce size will also catch perch, crappie, trout and other panfish.

The coolest thing about lipless crankbaits is that they can catch just about any predatory fish out there.  I caught my biggest king salmon on a black Cotton Cordell Hot Spot, and another huge one on a chartreuse Rat-L-Trap.  I've caught northern pike, walleye, lake trout, steelhead, large brown trout, and even catfish on them.  These lures work well on many saltwater species as well, especially bluefish and sea trout.  Talk about a versatile lure, eh?
Oh yeah, a warning, as with any treble hooked lure, when unhooking fish, be careful.  I reached to unhook a chain pickerel, and the slimy fish slid down and the hooks both lodged into my hand, still attached to the fish while it thrashed about.  Talk about painful!  Luckily, this time, I was able to grab the fish while my buddy got the hooks out of it.  The hook that went into the middle of my palm popped right out, but the hook mark on the left took some handy plier work.  Fortunately, it came out quickly.  After all, I'm not a surgeon, but I did stay at a Holiday Inn a few times!
So, when the early signs of spring reach your area, if you haven't already, give lipless crankbaits a try.  By the way, they work well all year.  However, they're my "go to" lure during spring and early fall.  So get out there and give them a try!  If this helps you catch a big fish, please leave me a comment and tell me the story!


Monday, March 18, 2019

How to Catch Crappie, Bluegill, Perch and Other Panfish

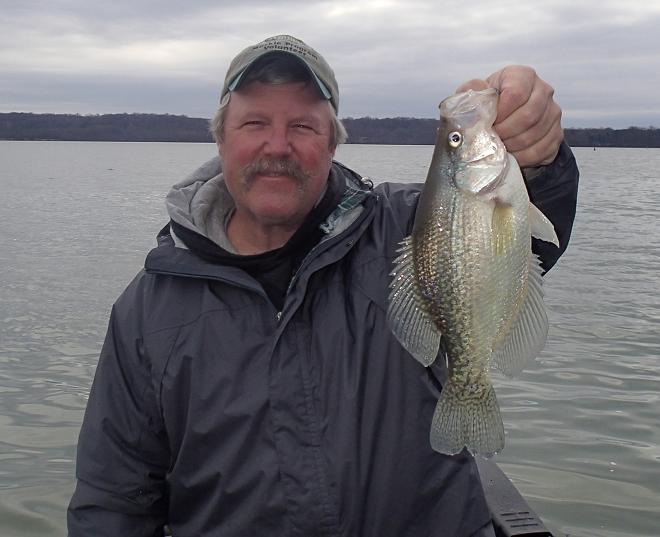
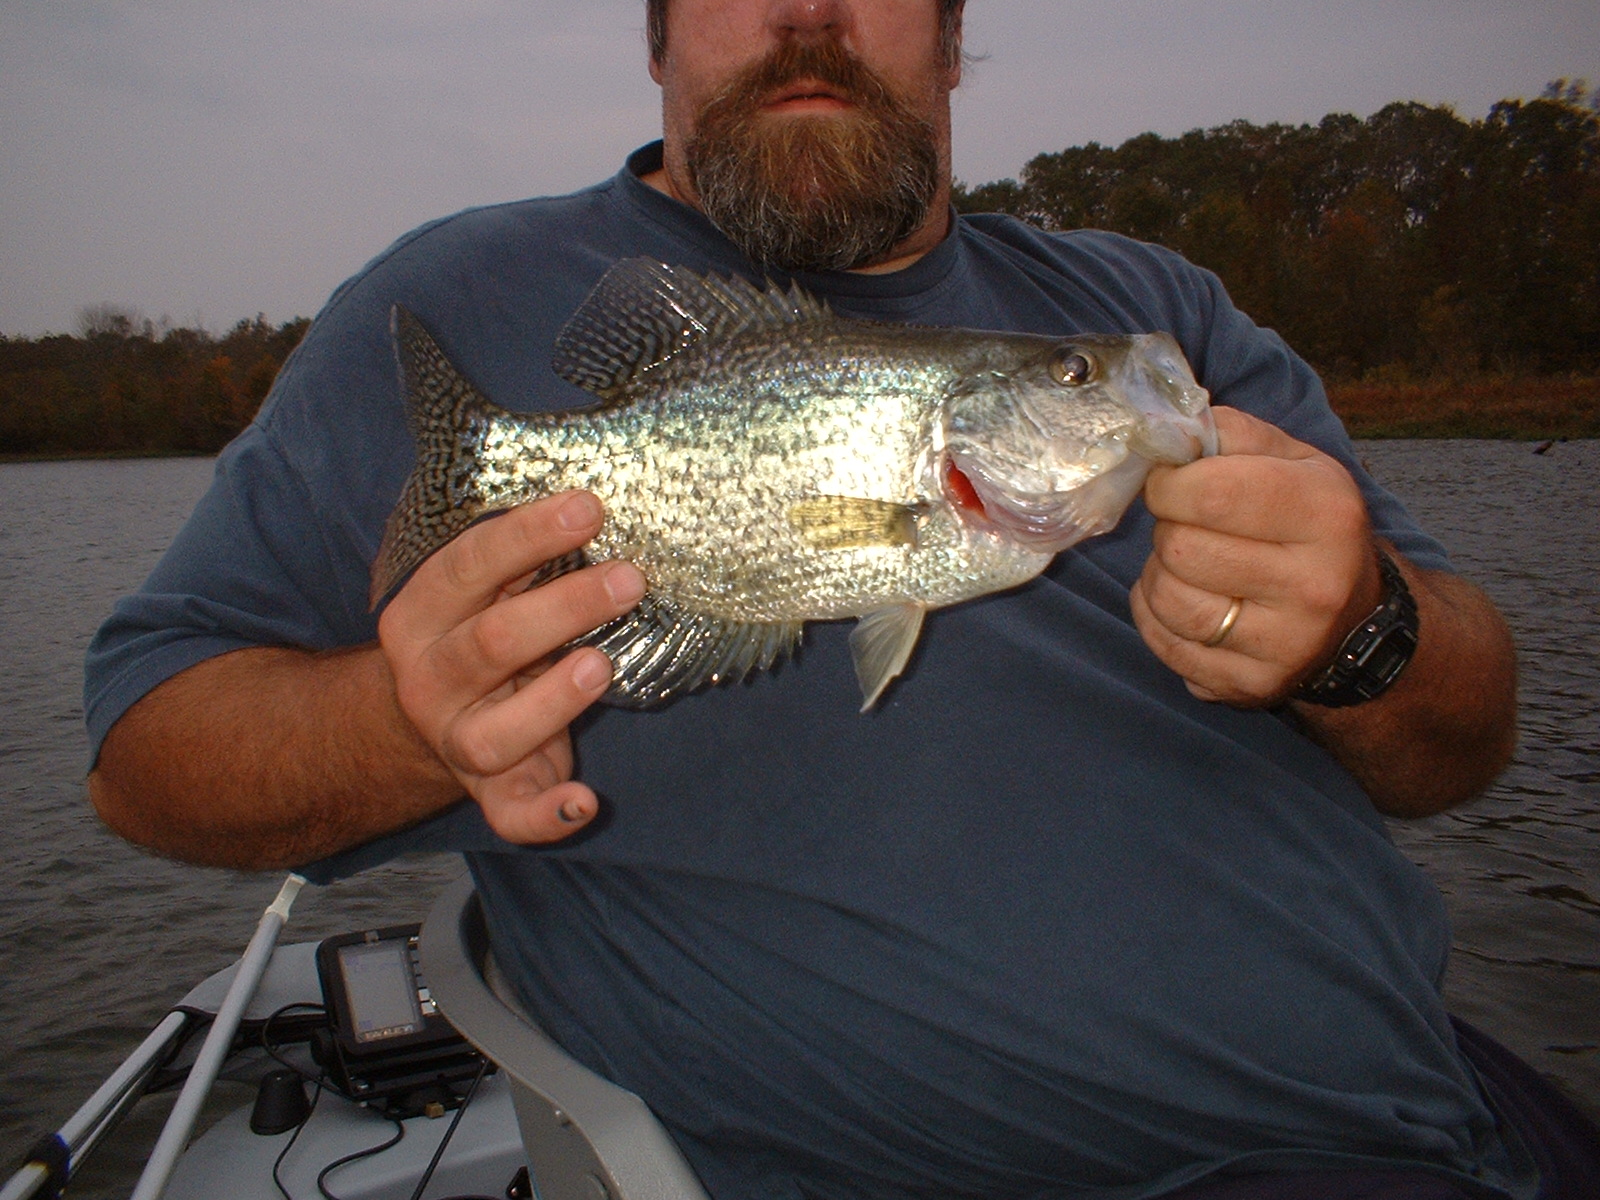
In this post, I'll describe some easy techniques, tackle, and lures to use to catch crappie, bluegills, perch and other panfish.  This crappie inhaled a leadhead jig tipped with a plastic twister tail grub while casting for crappie.
Catching panfish is a fun, easy, and inexpensive way to enjoy fishing.  In this post, I'll describe the basics of how we catch panfish on a regular basis using artificial lures.  We'll cover what rods, reels, and tackle that I like to use, as well as a few easy techniques and strategies that will help you catch more panfish.

Later in life, I learned to fish artificial lures, mainly because I accidentally kept leaving my worms and other bait in the trunk of my Dad's car.  When the bait died, it stunk up his car, and I had no ride to fish in.  My choices to adapt were to either improve my memory or change techniques.  So, I decided to change techniques.  I forget why...

...Oh yeah, mainly because using artificial lures to catch panfish is relatively cheap, and it doesn't leave a mess.  Not only that, using lures rather than bait keeps me relatively mobile, generally speaking.  The more mobile that I am, the more fish that I will find to catch.  That said, sometimes I'll carry some live bait to tip my jigs with to tempt finicky fish during colder months, but we'll discuss that later in the post.

First, lets discuss the tackle that you'll need.  Personally, I have rods dedicated to this type of fishing.  If I fish for multiple species, I'll have rods rigged for those species with me too, but if there is a chance that I may target panfish, I'll always bring my panfish rig.  My basic panfish rig is a simple one, an ultralight six foot, six inch ultralight rod, with a small reel (2000 series), matched with light line, usually 4 pound test.  For tackle, I carry an assortment of bobbers, or floats, a box of with an assortment of jigs and jigheads, and a box loaded with my favorite small soft plastic lures.
You can see my rig in this picture, an ultralight rod with a Shimano 2000 series reel, teamed with light 4 pound test line, and a small jig.  You can't see the bobber in this picture, but I was using one.  The jig is a chartreuse panfish tube in chartrueuse.
Now, let's talk about a couple easy techniques, and we'll start off with one of my favorites, the "Bobber and Jig" technique.  Many of us started out catching fish with our Dad or other adult as a kid, usually tossing out a live worm under a red and white plastic bobber.  When fishing like that, we learned the basics of catching fish under a float.  We'd cast the rig out, sit and wait for fish to bite, then, when the float moved or went under water due to actions other than our own, we'd set the hook.  So, let's delve a bit deeper into this technique and adapt it to using artificial lures rather than live bait.

The Bobber and Jig rig can be simple or complicated, depending on how seriously you take this kind of fishing.  I'd say I'm semi-serious about it, because I like to keep things simple.  I usually use a simple red or chartreuse round styrofoam weighted bobber that is about an inch in diameter that clips to my line.  Under that, at whatever distance I think the fish will be, I'll attach one or two small jigs.  I make sure that my jigs are tied so that they sit horizontally in the water, as much as possible.  I believe that I get more bites because a horizontally presented jigs best resemble panfish prey better than jigs that dangle vertically.  You may have to adjust the jigs throughout the day to keep them in a horizontal position.
This is the basic "Bobber and Jig" rig that I use.  The amount of line below the float can be as much as five feet under the float at times, but most of the time, when fish are active, I'll keep the jigs about a foot to three feet down.  I cinch the jig up tight so that it stays horizontal, as pictured above.
Now that we understand the basic rig, let's discuss how to fish it.  You have many options.  One way is just to cast it out to a likely fish holding spot, and let it sit until a fish hits.  Another way is to do that, but if you don't get a bite right away, give a the rod a twitch or two to "pop" the bobber a little bit.  How much to move the bobber depends on how active the fish are.  If the fish are active, a few sharp pops may do the trick.  If they aren't active and want a more subtle presentation, I've even gently pulled the bobber over just a tiny bit.  That little action will bounce the jig underwater a half inch or so and maybe move the jig a few inches in a certain direction. That may be enough to induce a strike.  This technique is effective if you know specifically where the fish are, especially in colder weather.

If there is a little chop on the water due to wind, you can just let the wind do the work, allowing the ripple waves to bounce the bobber while the wind pushes your rig along the drift that you wish.  Using the wind to cover water is a great way to locate where the fish are.  Once fish start biting, remember where you had your bite so that you can make sure to achieve the same drift on your next cast.  Chances are good that, once you have bites at a certain spot, more fish are there than just one.
My buddy Bill, with a slab crappie caught while bobber and jig fishing.  I don't know if I took this picture or not, but this is not how to take a good picture.  I don't think Bill would like to see the top of his head missing.  But, it's a nice fish anyway.
If it isn't windy, and the fish don't like the lure just sitting there, and popping it in place doesn't seem to draw strikes, or your not covering water, you can try a very slow retrieve, maybe mixing in a few rod twitch pops along the way.  This and the wind drift techniques are effective when searching for fish.  And, of course, depending on conditions, you can try a mix of all of the techniques above to try and draw strikes...and you should!  But, the basic thing to remember is that, no matter which method you choose, if you see your bobber stop, go under water, bounce, or move in a way that neither you or the wind made it do, set the hook, because it's likely a fish.  Anything different, set the hook.

When fishing a bobber and jig, for open water, I may try tying on two jigs.  Sometimes, when fish are aggressive, you may catch two at a time!  If I'm fishing cover, I will only go with one.  I always start by fishing my jigs about two or three feed down at first, then adjust either deeper or shallower if I don't get bites.  If I see fish dimpling the surface or cruising around, I fish shallower.  It it's cold or I don't see activity, I may try fishing deeper.  Let the fish tell you what to do.

I usually also fish small jigs when bobber and jig fishing.  I'll start with one or two 1/80 or 1/64 ounce jigs tipped with my favorite soft plastics.  I also try changing up colors until I find one that the fish like.  But, if I had to state a general rule, I'd say bright colors in darker water or darker skies, and natural colors during sunny skies and clear water.  However, I also think that white and chartreuse are tough to beat.  A former Potomac River fishing guide once told me, that when fishing that river, "If it ain't chartreuse, it ain't no use"!  Try different things until you get the results that you want.  You'll find your favorites once you start catching fish.
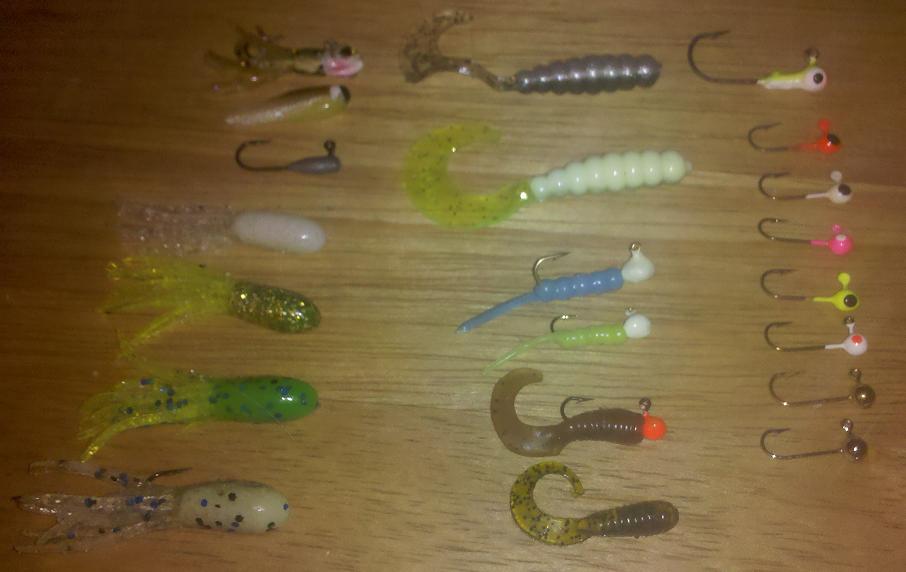
These are some of my favorite jigs for panfish.  On the left, you can see the small 1/64 oz. tube jighead that I use, and a selection of tubes.  On the right you can see an assortment of jighead sizes and colors that I use, from 1/32 oz. down to 1/64 oz.  Not picture here are similar colors in the 1/80 oz. size.  In the center, the top two larger "grubs", or twister tails, can be fished with or without a bobber.  The two jig/plastic combos below that are from Custom Jigs n Spins tackle company, called Ratsos, in 1/64 and 1/80 oz. sizes.  Below that are Bass Pro Shops one inch Squirmin' Grubs in pumpkinseed and watermelon colors.  I find BPS tubes and grubs to be very effective.  They're inexpensive and have a good color selection as well.
Here's the deal though, it's a cheap way to get into fishing, but, expect to lose some tackle.  Bobber and jig rigs are not the easiest, most accurate rig to toss, and you might end up casting your rig into trouble.  Even when experienced at this, people will still find a tree to hang their lures in, or cast too far into cover, or, just snag on a log while casting and jigging.  It happens.  If you can't retrieve it, break it off and tie on another one.  If you're shore fishing, maybe you'll get lucky and the wind will blow your float back to you.  That's why I carry a good assortment of lures and floats.  It's a good thing that this stuff isn't expensive.

Oh, another thing to remember, is that someone else's misfortune could help you find a good place to fish.  Good spots always seem to have bobbers hanging from them, or from trees just overhead.  We had a spot that was so good that we found, it has so many bobbers in it that it looked like a Christmas tree!  Just a good tip that may help you find a good spot on a new lake.

Now, a quick word about floats...there are many types out there.  You don't have to be stuck on my favorites.  Try different ones out and see what works for you.  I like the weighed round styrofoam ones because they're cheap and easy to cast a long way, and they work great for me.

For fishing really deep water, you can try using slip bobbers.  Basically, the way that they work is that you have a piece of rubber, called bobber stop, on the line, say, 15 feet from the jig, that is wound into you reel.  When you cast, it slips through the guides easily.  Then, when the rig hits the water, the line feeds through the float until the float stops at the bobber stop, and your jig reaches the depth that you want, in this example, 15 feet.  You may need to add split shot above the jig so that the line feeds through and gets to the right depth.  Anyway, you can cast these deep water rigs much easier than trying to use a snap on float when fishing deeper than four feet.  I usually use the snap on ones when fishing five feet or shallower.

Also, there are more expensive floats that are very sensitive, if you want to refine your techniques.  Here, I'm just giving you basics.  Now, as far as float shapes go, in general, the more resistance a float has to the water, the more fish can feel it and the more difficult it is to sink under the water.  You have to match the amount of weight of your lures to the right float.  Thinner, cigar or pencil shaped floats are very sensitive and go under easily without fish feeling them.  Fat, round, large floats are best used for heavier baits, as they provide a bunch of resistance.  You may never see a panfish biting a lure using large floats like these.  That's why I like the one inch size.

Where are the fish?  They can be hiding in weeds, in deep water near a dam, hiding in a log jam, or on the back side of a windy point or current break.  Panfish are predators and will find places to ambush their prey.  They can be found in tidal or non-tidal rivers, lakes or creeks.  Most likely, you can find them in a body of water close to home.  Just think to yourself, if I were a panfish, where would I hide so that the wind or current might bring me a nice minnow snack?  These places may vary depending on the time of year.  During colder months, you might find them around deeper water.  During warm spells during that time, or when it warms up, try areas where shallows next to deep water warm up from the sun quickly.
Slab perch like these may be mixed in with crappie, bluegills and other fish.  We found a bunch of fish on this day fishing behind a point that provided a wind break.  The fish were stacked up on the backside of the island, as the wind created current that pushed baitfish to the predators in wait.
A nice location would be on a northern shoreline, where the southern sun shines and warms the shallows.  If you find some nice cover there, like a tree or brush, that is a great place to try and cast to find fish, especially if that cover provides a current break.  Sometimes, when fishing a northern shoreline, if a south wind piles up along the bank, it will bring warmer temperatures to that area and along with it, active fish.  So, during colder months, try and find the warmest spot on a body of water, the best cover that will hold fish, and try your luck casting there.  Most likely, you'll get into some panfish.
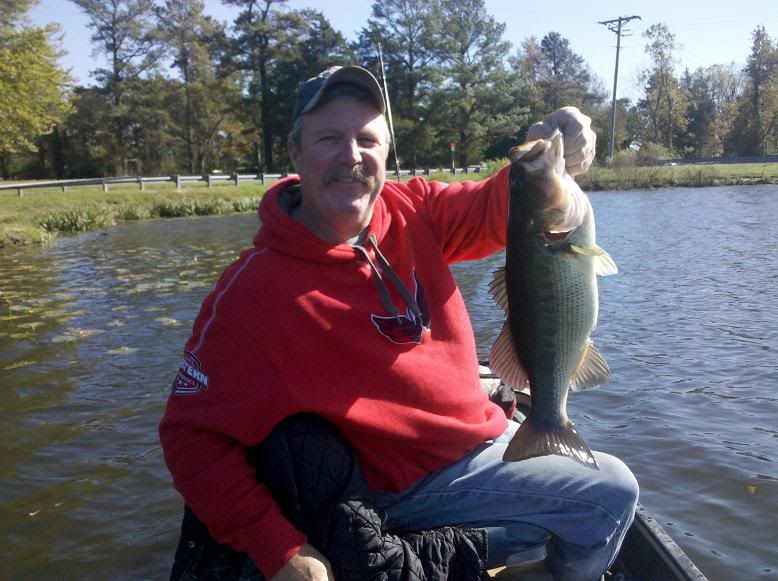
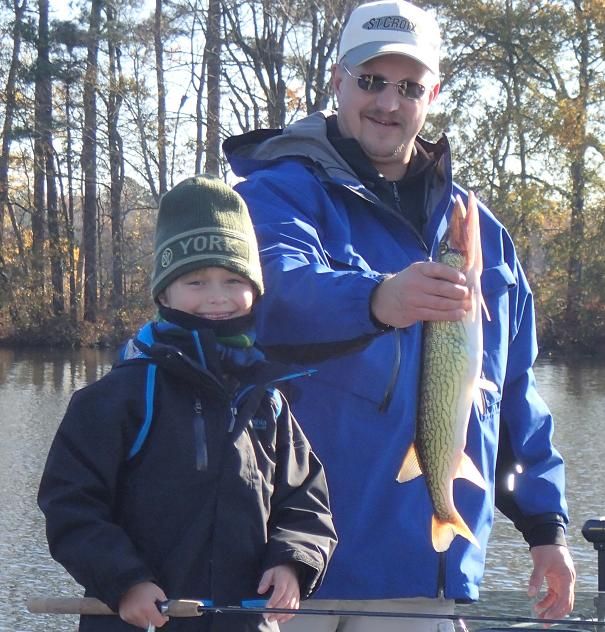
When my buddy Bob, and his son, Carson tried some winter panfishing with me, they had a blast catching slabs like this all day long while casting jigs with soft plastic twister tails.
Once you find some cover, like a bush or tree in the water, you don't have to always cast into the thick of it.  In fact, unless you become an expert at casting a bobber and jig, just try to get close.  These rigs are not as easy to cast as only having a lure on the end.  If you're close to the cover, most of the time, active fish will come out of the cover to check it out.  Only during tough cold fronts, when fish may not be active, you may need to fish tighter to the cover.  But try out a foot or two, if you can, first.
Large bluegills are extremely fun to catch using these techniques.  Just look at the colors on this fish!  What a blast you can have when you catch dozens of these guys.
Once you get the hang of finding and catching fish, if the fish you're catching are small, then you can start the process over on other bodies of water until you find some bigger fish.  When you find actively feeding panfish, you will start catching good numbers of these fish.  You may have hundred fish days or certainly enough action to keep you entertained.  Once you find your favorite "honey holes", you may have days when fishing is tough.  This is where tipping your lure with live bait, like spikes (or maggots), waxworms, or just about any bait may trigger some bites.  If they're not biting after that, you can try changing locations on the body of water to find a new spot, or change lakes.  Don't sit and wait for fish or you may get skunked.  Move, that is the key, and it may save your day.
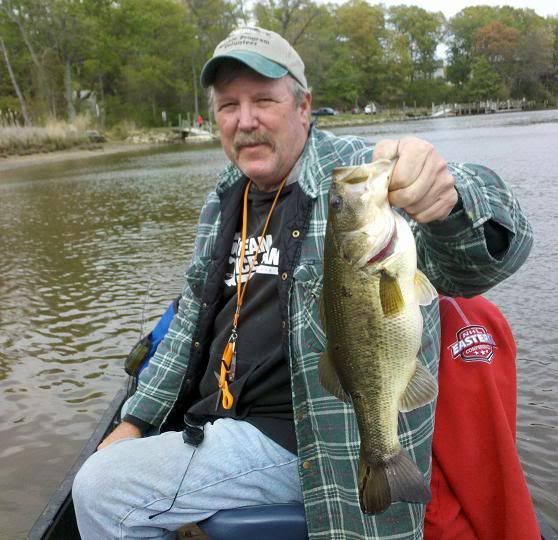
Rodger will tell you that catching panfish like these can really be a blast.  The techniques and suggestions described in this post will help you find fish like these too.
Another technique is to just tie the jig directly on your line without the float.  This is very effective if you're fishing an area with less snags, it's not that windy out, and the fish are aggressive.  I usually fish 1/32 or 1/16 ounce jigs when casting, depending on how much wind there is.  Wind will put a bow in your line, so more weight counteracts the wind.  If it's too windy, you may find it best to add the float and let the wind do the work.  When not using a float, if you're boat fishing, you can vertical jig or cast to spots.  Most of the time, if you shore fish, you may have to cast, but sometimes if you have access to boat docks, piers, or bridges to fish, you can try vertical jigging.  Just drop the jig down into the water, and twitch your rod tip to make the jig dance.  Dancing jigs attract fish.
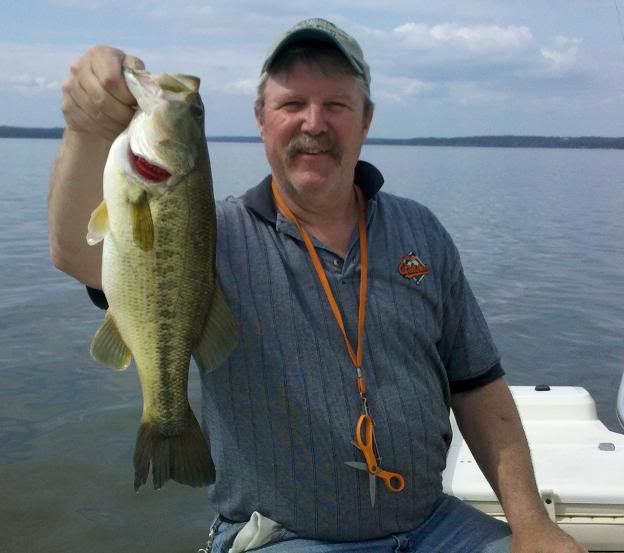
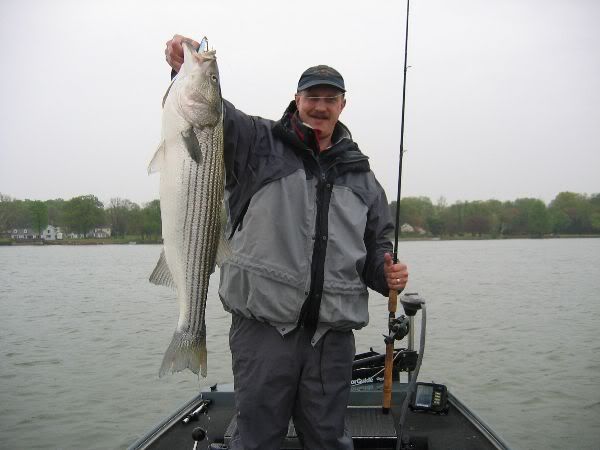
My buddy Howard loves catching slab crappie using these techniques!  We were fishing deeper water winter condtions on this day, using both techniques.  The fish weren't deep, but they were over deeper water.
When casting, you can try jigging it, but sometimes the fish will hit the lure on a slow fall.  If they do this, you will see the line twitch or move at the water line or maybe even feel the bite.  For this reason, it's very important to watch your line where it enters the water.  Often, you may not feel it, so, if you see anything different, set the hook.  And, of course, if you feel a "doink", set the hook.  Sometimes, after letting your lure sink a slow retrieve might work.  Like bobber and jig fishing, try different things to get them to bite.

When to use the bobber and jig vs. casting a small jig for panfish?  It depends on how active the fish are, how big the fish are, and the conditions that you're fishing.  For me, if I'm fishing when the fish are active and it's not windy, I probably would start casting a larger jig, say, 1/32 with a two inch twister tail.  If it's windy, I may try vertical jigging if possible.  If the fish are finicky, or it's too windy to cast, then I'll go with the bobber and jig and downsize to smaller lures.  If the fish are really finicky, then I may go as small as a 1/80 oz. jig.

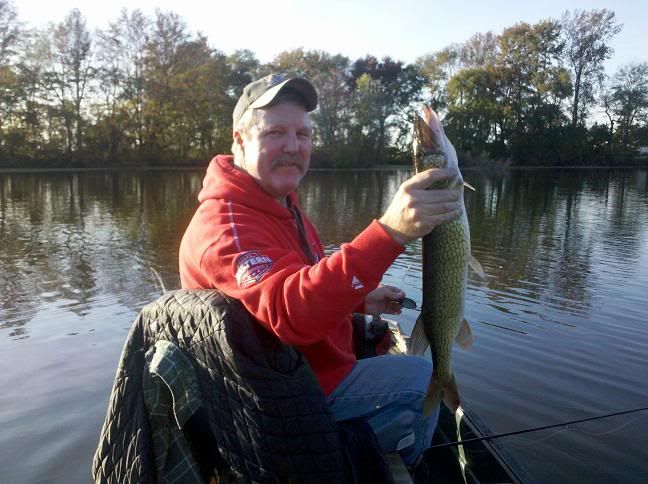
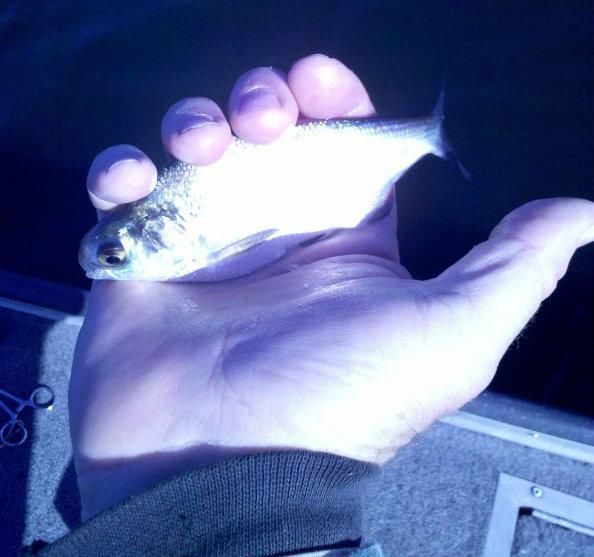
One thing that I love about fishing small jigs like this is, that you never know what you're going to catch when you get a bite.  You can catch almost anything.  In addition to the panfish that I've targeted, I've caught everything from golden shiners, trout, largemouth and smallmouth bass, chain pickerel to even catfish and carp!  It's a lot of fun.  Give it a try!
Large golden shiners will hit these small jigs too.  Usually, on some lakes that we fish, we will find them mixed in with the panfish that we target.  I like catching just about anything that swims, and bobber and jig fishing can do that for you.
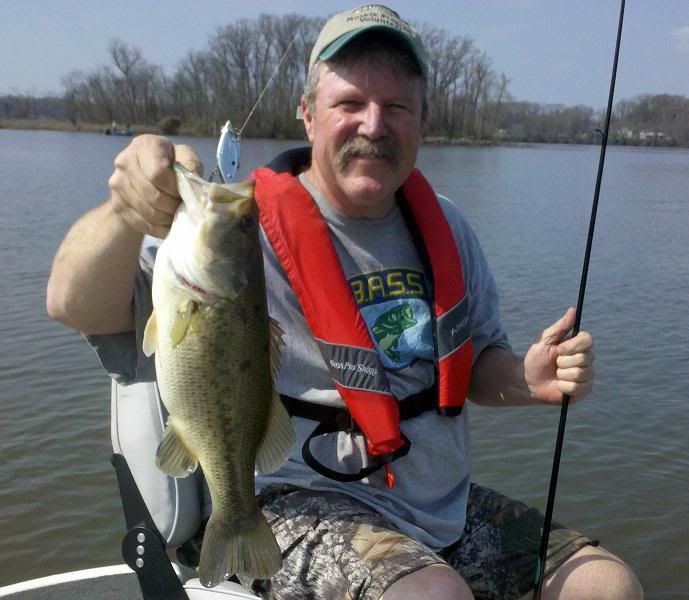
You never know what you're going to catch using small jigs while targeting panfish.  While targeting yellow perch, I caught this nice largemouth bass on a 1/32 oz. jighead tipped with a two inch chartreuse plastic twister tail grub.  What fun, huh?
If you aren't catching fish now, doing what you're doing, then maybe try the techniques above.  If you do, you're sure to succeed.  Good luck, and give me a comment back and let me know how you do, if this post helped you.


Thursday, March 7, 2019

My Introduction to North American Native Fishkeeping

Striped Blenny (Chasmodes bosquianus)

Part of my obsession with the outdoors includes creating a replica of it indoors.  And my largest obsession with the outdoors is with fish of all kinds.  I love to catch them, watch them, learn about them, and collect them.  So, this is where I bring them indoors, by collecting my fish locally and building aquariums for them that match their environment.  I've had various aquariums throughout my child and adult life, starting with freshwater guppies, tetras, angelfish and modern world cichlids, and during my transition from later high school years and into college, a move to saltwater fishkeeping.

After college, I moved away from saltwater fishkeeping to keeping native freshwater fish and set up my first native stream tank.  Why did I do this?  Simple.  Money.  Or, rather, lack of discretionary money, because just about everything I made at that time went to rent, food, bills, other hobbies and sports.  Native fish were free, and I already had all of the equipment that I needed.

I've never been a "reefer".  No, I'm not talking pot here, although I was never one of those either LOL, I'm speaking of keeping coral reef aquariums.  It's not that I wouldn't keep one, rather, I just haven't gone that route yet.  Maybe someday I will.  In fact, my move away from saltwater (or "Fish Only") aquariums was a financial decision that I had to make as a young adult when my saltwater fish tank had a massive fish kill after a power outage while I was away from home.

For those aquarists out there, how many times have we heard that horror story before?  It seems to happen to everyone.  It happened to me when I could least afford it.  I lost a medium sized blue angelfish, a flame angelfish, a potters angelfish, a heralds angelfish, a bluehead wrasse, a molly miller blenny, a red spotted hawkfish, and a yellow dottyback.  That's a lot of money for someone right out of college with an entry level type job!

So, what did I do?  I took all of the high flow equipment from my saltwater tank and converted the tank to freshwater.  I used stream gravel and rocks to set up a native stream tank.  After cycling the tank, I collected local minnows, dace, shiners, darters, and sculpins and had my high flow stream tank.  I absolutely loved that tank, and, I discovered that our local species are as colorful, and sometimes more colorful, than those that we pay money for at our local fish stores!

After that, I got engaged, then married, moved into a small condo, had a beautiful daughter, and stopped fishkeeping.  I didn't have money or time, for many reasons, mostly too many hobbies, to keep it going.  Instead, I kept salamanders and frogs, and set up a primitive paludarium.  I didn't get back into fishkeeping until recently.

One of my all time dreams was to keep local saltwater or brackish blennies.  A student teacher at my University was studying them, and got me hooked and fascinated with them.  I had kept a local blenny while in college in my fish only tank until another fish killed it.  I caught that fish during a class field trip out on a research vessel in a trawl net and they let me keep it.  That blenny was one of the coolest fish that I ever had in an aquarium.  After that, I had experience keeping various blenny species that I purchased at my local fish stores (like the molly miller mentioned above).

I became hooked on blennies!  I was obsessed with them.  But hey, why spend money at stores on them when I can collect them locally for free?  And, our local ones are just as interesting and as colorful as most of the store bought ones!
Local blennies, like this adult male striped blenny (Chasmodes bosquianus) captured my heart many years ago while in college.  Now, I can observe them in a close replica of their natural habitat right in my home.
So, when I moved to my house and had enough space to really get back into fishkeeping, that was my first goal, to set up a local blenny tank.  Only, I took it a step further.  I set up a Chesapeake Bay Oyster Reef Biotope Aquarium, to not only house my blennies, but to give them a home that feels like home to them.  My goal was to replicate their environment in every way possible, with hopes that they might breed.  I basically wanted a slice of a Bay oyster reef in my home.  I'll go into more detail on those projects soon in future posts.  But, for now, please note that everything that I hoped would happen, happened successfully (knock on wood) over the past couple years.  My blennies and other fish are breeding regularly.
This is a full tank shot of my current Chesapeake Bay Oyster Reef Biotope Aquarium.  This tank is a 20 gallon long.  My final build will be a 100 gallon cubish shaped aquarium.  It's my dream tank!
But, as if one major project wasn't enough, I started another one.  I am working on a local North American Native stream tank inspired by my past stream tank as well as tanks from my friends at the North American Native Fishes Association.  I'll post more on this build later as I make progress, so stay tuned.
This is the current state, almost, of my stream build.  It's a 75 gallon tank that I'll stock with local stream species.  I carved and painted the tank background out of pink polystyrene foam insulation board to look like a local shale cliff formation.  I'm currently working on faux sycamore tree roots as well.
So, that's where I am today with my North American Native Fish aquariums.  I'll document many topics about this journey detailing my builds, so stay tuned.  For now, here's a video of my oyster reef aquarium.  Hope you enjoy it!

Wednesday, March 6, 2019

Fossil Collecting in Florida - a Trip Report

Our nice mako and juvenile meg two teeth on the right, along side Cris' meg (left)

When my wife and her friend planned a get together trip in Central Florida earlier this year, she asked if we wanted to turn it into a mini vacation.  Always with fossil collecting in mind, and knowing the rich bounty of fossils that Florida has to offer, my daughter, Riley, and I convinced her to give us a day to go fossil collecting.  This post depicts the planning and actual events of our fossiling experience.

But, where to start?  We know that there are tons of fossils in Florida, but, it's a big state, and all of it was submerged throughout various periods of geologic history.  Our interest this time focused shark teeth, with a chance at finding the prized megatooth, of the largest predatory sharks in recorded history, Carcharocles megalodon.  If you do some research, you can find the popular public place to collect, where you can beachcomb or sift for shark teeth.  But, it would involve a lot of driving and testing to locate spots, and that takes time, and we didn't have the luxury of time.

So, we figured that the best thing to do was to do what anglers do when they want to find a trophy fish, hire a guide.  So, we researched and found some guides that really interested us.  It didn't hurt that we also discovered that someone we "knew" (virtually) from our past experiences on The Fossil Forum and their once heralded chat room that turned out to be a guide.  We booked a trip with Fossil Voyages' PaleoCris and WILDKYLE (their YouTube and Instagram names).  Of course, we had some questions about what to bring, etc. and they answered all of our questions, making it easier to prepare.

Still, this was a February trip, and the trip that we booked called for wading in creeks while shoveling and sifting for fossils.  Our main concern was weather or not to bring waders or hip boots, or if we could we wet wade or not.  In February, we wondered if the water temps in Central Florida were too chilly to wade in.  As it turned out, not at all, this time.  The weather was in the mid-80s all week while we were there, and nighttime lows weren't low enough to chill the water, so wet wading was fine.  After all, why bring heavy waders and pay for another checked bag on the plane?  We were trying to keep our vacation as cheap as possible.  As for other needed equipment, really, all that we needed was ourselves, dressed to get dirty and wet, a change of clothing, sunscreen, bug spray, some snacks and water.  Cris and Kyle supplied all of the collecting equipment.

First, we met them at a public shopping area, and then followed them to one of their favorite spots to take their clients.  From our vehicles, it was a short hike to the creek, and not a long wade to the area to start our fossil search.

So, we started sifting and...well...did they put us on fossils?  You tell me.  On our first and third sifts of the day, we found a nice juvenile meg (short for megalodon) in near perfect condition, and a monster giant mako shark (Carcharodon plicatilis).  This shark is considered by most experts in the field as a direct ancestor to our modern great white shark, Carcharodon carcharias.  The only difference in their teeth are the lack of serrations on the extinct shark.  Other than that, the teeth in each position of the jaw are nearly identical in shape and form.  The colors on this tooth were striking.  In the pic at the top of this article, these two teeth are the smaller of the three teeth pictured.

So, the shoveling and sifting adventure started with a couple huge finds.  Man, I thought then that this would be easy and we'd be wading in meg teeth in no time!  Of course, it's never easy.  You have to work for it, and yes, even here.  Just like catching a monster bass on your first cast, many times you have to work your butt off to find good fish the rest of the day.  That was the case here too.  Now listen, I'm not complaining at all, because at the end of the day, our combined finds were quite amazing for such a short time collecting.  Just a note, we collected until I couldn't take it any more.  Our guide friends would have accommodated us longer and they certainly worked hard for us all day.

About our guides, let me say here that they are first class, nice, friendly and certainly fun, and both Riley and I really enjoyed their company.  But, they were also very knowledgeable, helping Riley and I identify our finds as needed.  We knew about the teeth IDs, but some of the other vertebrate fossils and artifacts required their assistance, and that was much appreciated.  Not only that, my aching back slowed my shoveling pace later in the day, and both Cris and Kyle helped us fill both our sifters.  We couldn't have asked for better guides.

I won't chronicle the rest of the events while collecting, because you can see pretty much what happened for yourself in the two videos that I'll link later in this post.  I highly recommend that you watch and "like" them both, and subscribe to both channels.  But the bottom line is that it was a productive day, and we had an absolute blast, and a pleasure meeting these two avid paleontologists.

In the following pics, I'll explain some of the finds.  Riley and I found most of these finds, but about 1/4 of them were thrown in that Cris and Kyle found, maybe more.  I couldn't remember exactly who found what for the most part.  Riley and I were a team, so anything that I say that I found, or Riley found, we actually found together.

These are the shark teeth, stingray dental plate fragments, and fish fossils found on the day.  The largest complete tooth in the middle is the large giant mako that we found on the third sift, and the small meg to the left was found on the first sift of the day.  Above those teeth are the fish fossils, including three sections of  a sawfish rostrum, a catfish spine,  a barracuda tooth and some other fish teeth.  Below the mako tooth are various smaller shark teeth found during the day, including a smaller mako tooth found by Cris, some snaggletooth shark teeth (Hemipristis serra), tiger shark teeth, and below them lots of lemon and requiem shark teeth.
Most of these bones and vertebrae are dugong (Metaxytherium floridanum) bones.  The two bones below are dolphin, and the one above that may be a fragment of a Gomphothere tooth.  A Gomphothere is an extinct elephant like mammal.
The bone in the center of the pic above is enlarged here.  It's a dugong ear bone, and apparently not very common.  Riley found this beauty in her sifter.
The two bones on the left are partial dolphin jaw bone fragments.  In person, you can easily see the slots that the teeth were placed.  This picture is not very clear.  The fossil to the right is the Gomphothere tooth fragment.
The fossils  in the upper left quarter of this picture are turtle shell fragments, and below that, some shells and internal molds of snails and clams.  The fossils in the upper right include the crocodile (Thecachampsa americana) scute that Cris found, and some croc teeth that Riley, Kyle and I found.  To the right of that is the meg tooth that Cris found.  The bottom half of the picture are the Native American artifacts that we found collectively, with the hammer stone to the left, some chert reject pieces (likely split when trying to manufacture points), and three pieces of pottery.  The bottom piece of pottery is old, but modern.  As both Cris and Kyle pointed out in the videos below, we were able to collect these artifacts because they were found on private property.  Incidentally, the hammer stone is a tool made from a chunk of dense limestone that is also packed with fossilized bivalves and other critters, so it's an artifact and fossil one one!
These fossils are from the late Miocene, about 8-9 million years old, and are from the Coosawhatchie Formation.

At the end of the day, I was exhausted from shoveling and sifting.  My back was in a ton of pain, and really reminded me of how out of shape I was.  We still had an hour and a half drive back to where we were staying, so, I was in a bit of a hurry to get out of there.

Cris and Kyle had some more work to do to close out their videos, so they did that while I cleaned up the fossils.  I accidentally scooped up Cris' meg into my container, not paying attention.  I didn't realize it until we returned from where we were staying.  I immediately texted Cris and apologized, and offered to ship it back to him, but he declined and told me to add it to our collection in our Florida riker mount.  I couldn't believe his generosity and humbly accepted his forgiveness.  I felt awful about the whole thing.  What the heck was I thinking?  Our entire collection is of stuff that we found, except for some stuff that we traded at the request of others that really wanted some of what we had.  Now, that isn't the case, and it troubles me.  I just hope it doesn't jeopardize our chances to book future trips.

Anyway, on to more good stuff for you guys to follow, the videos and YouTube Channels of both Cris and Kyle.  I hope you like them as much as I do.  They're fun, informative, and keep you hooked to the next one.  Please subscribe to their channels, and if you get a chance, contact them and book them.  I highly recommend it.  Please watch both videos, they each have some different stuff about our finds.  Also, please find and follow them on Facebook and Instagram.  You can contact them via Instagram to book a trip.

Cris' video:

Kyle's video: